One of the best interior updates you can make to your street machine is a fresh set of gauges. Not only do you get to monitor what’s going on with your driveline, but we’ve found it amazing just how much of a difference a set of nice looking gauges make in a car.
One company that understands the importance of combining form and function with accuracy is Classic Instruments. They’ve been building gauges for over 40 years with the intent to keep as much manufacturing in-house or within their local region of Boyne City, Michigan. They even build their own air-core movements for each gauge and have another division that focuses on custom setups and restorations.
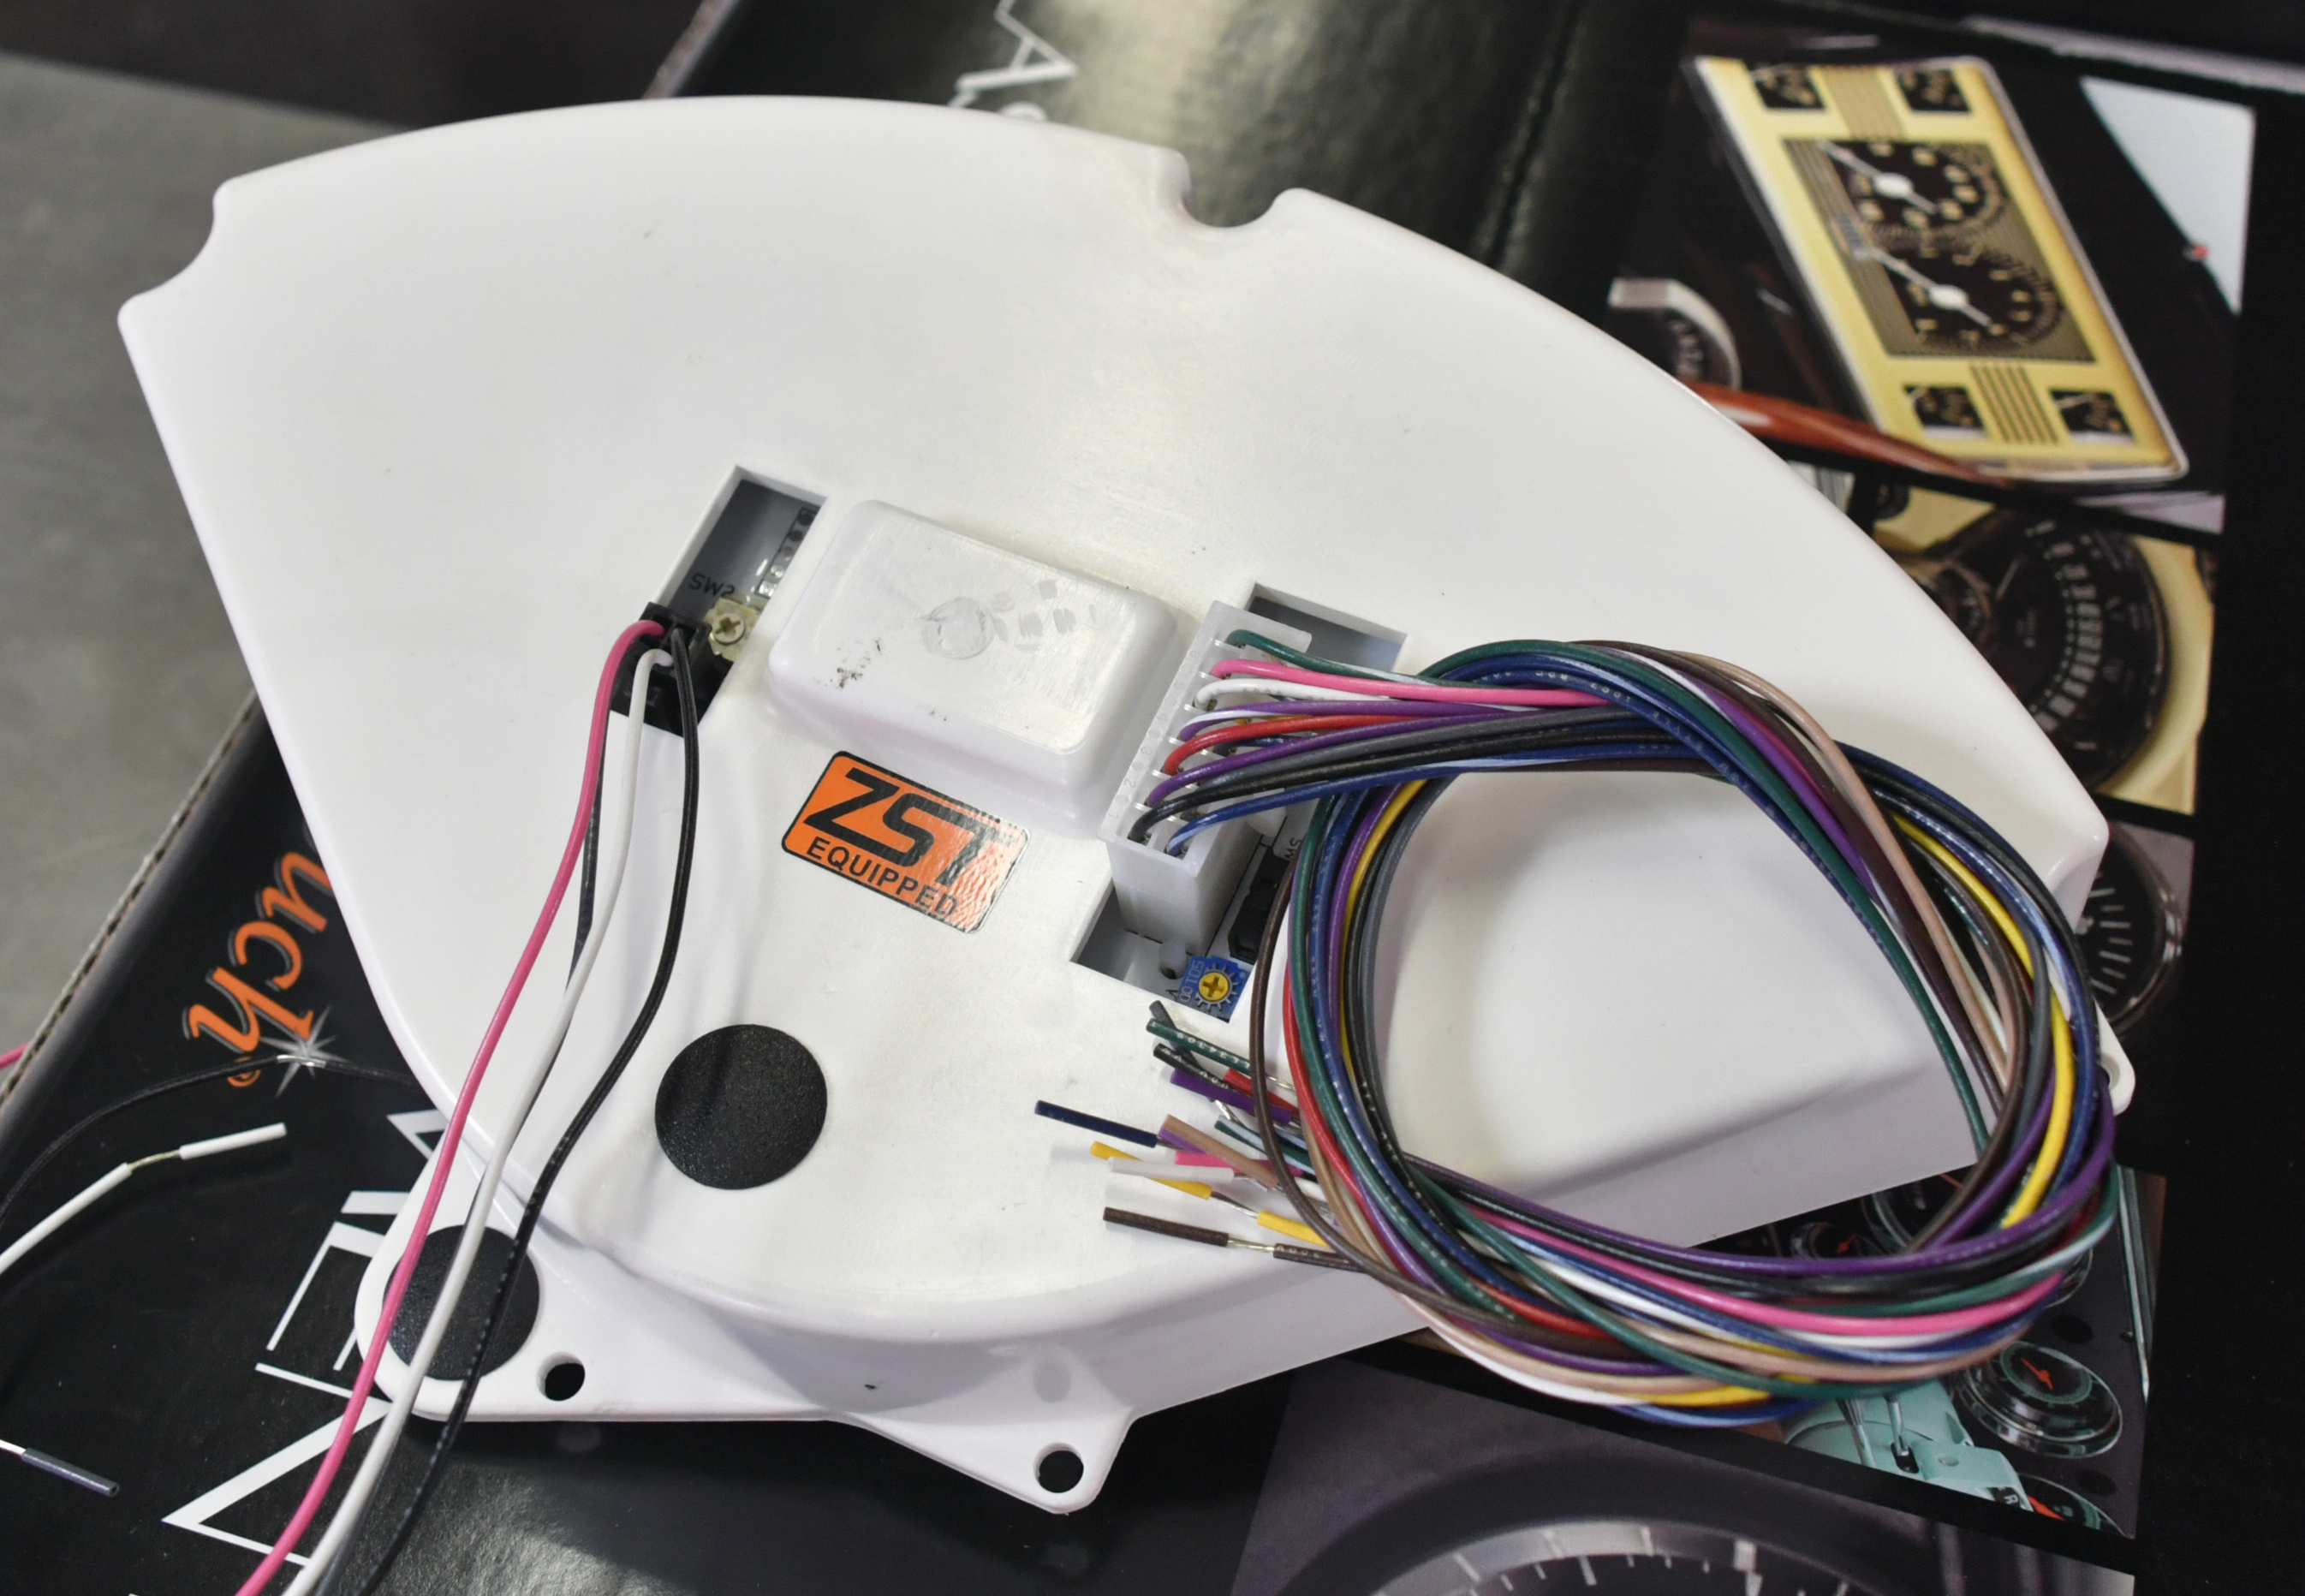
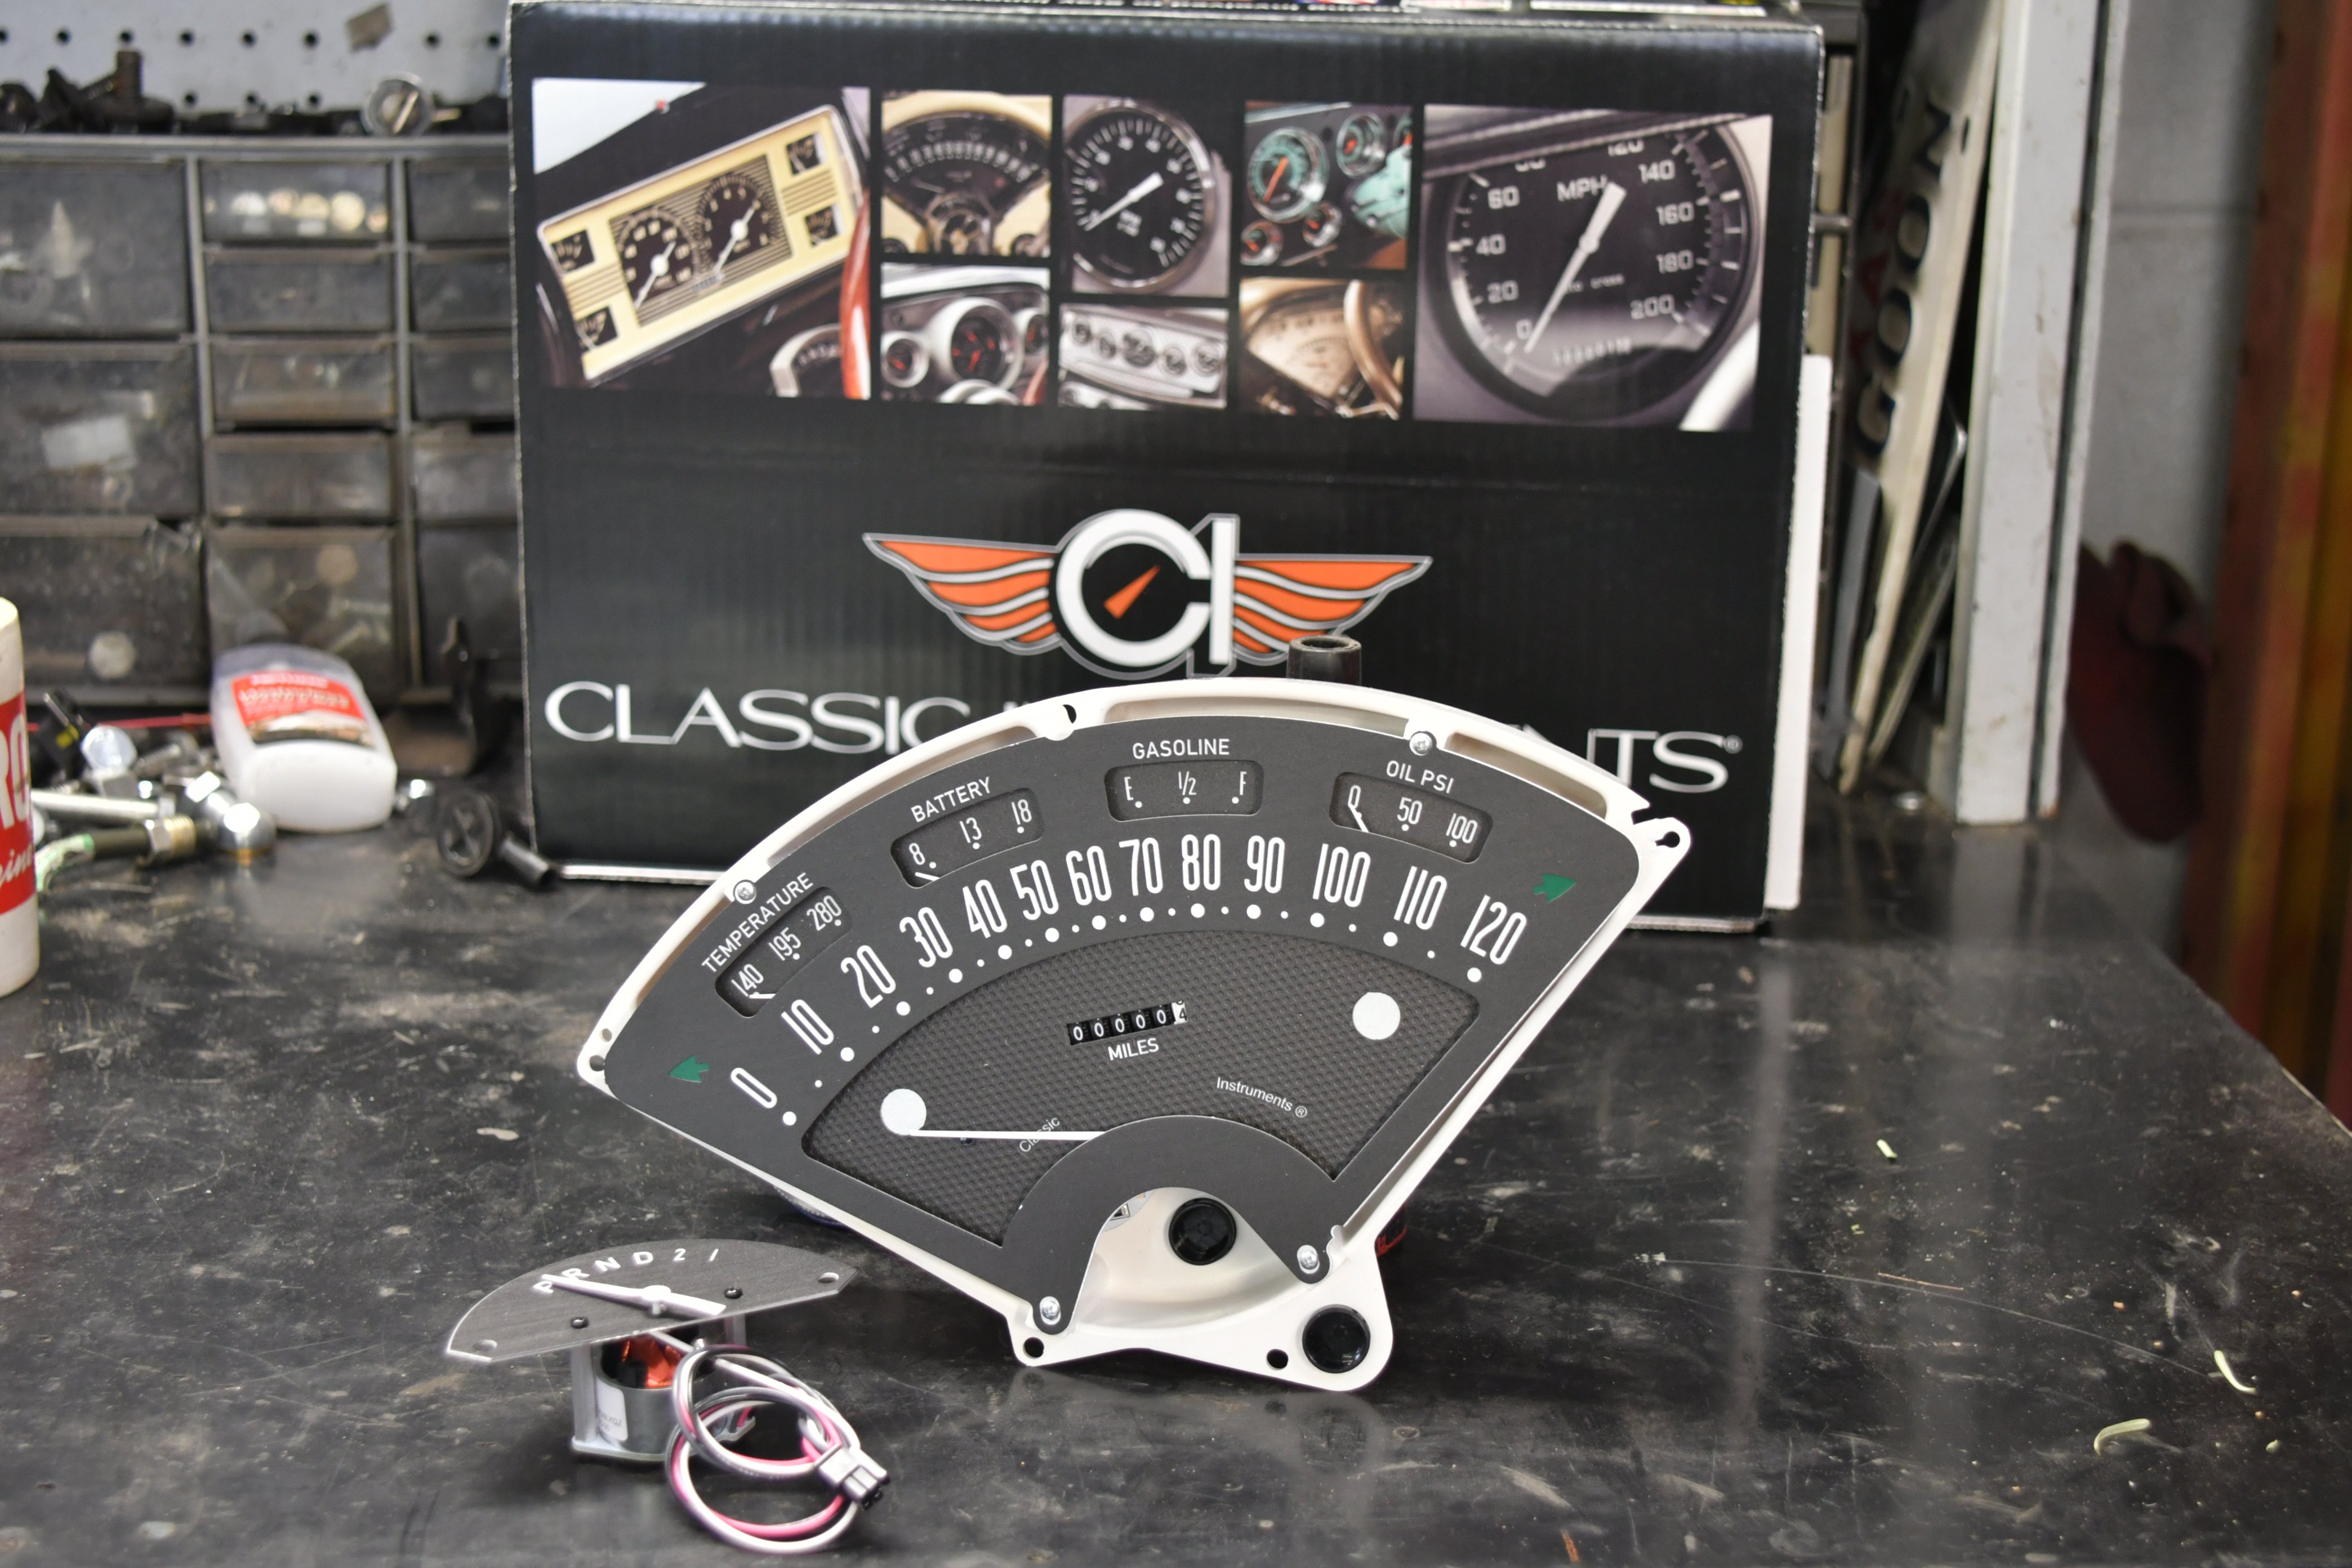
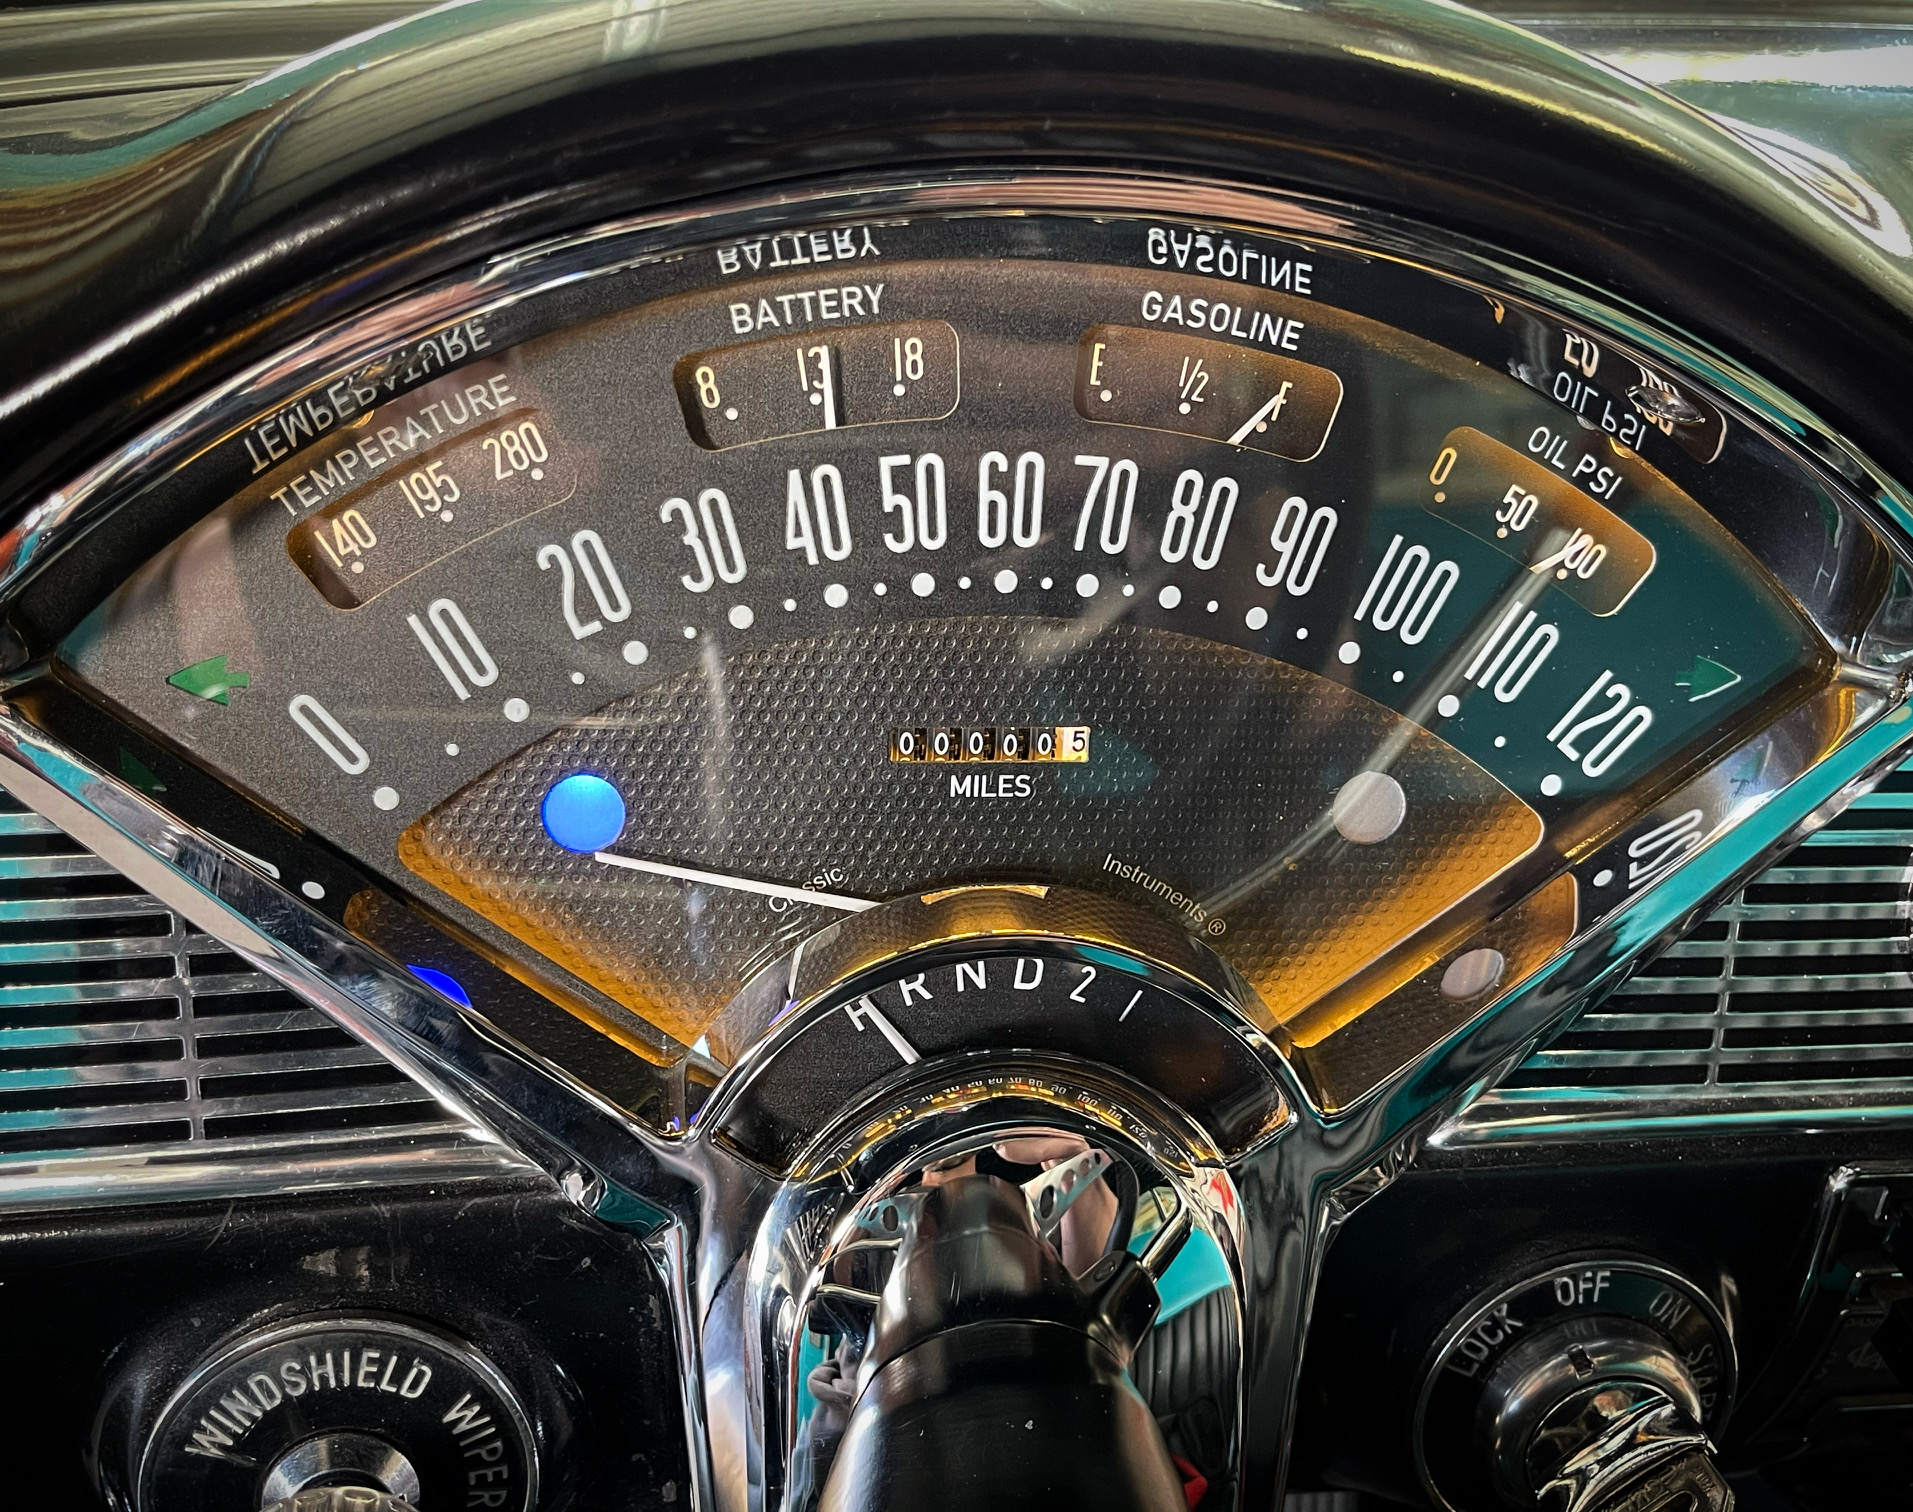
The Bel-Era III assembly is mounted in a sturdy injection-molded housing. This provides a solid mount for each gauge and seals the entire assembly. The single connector on the right connects everything in the cluster. The three wires on the left are for the optional gear indicator.
Not only does Classic offer a full line of competition gauges, but they’ve put together a long list of direct-fit gauge assemblies for popular street rods and muscle cars. A couple of their most recent releases are for ’66-’67 Novas and Chevelles along with a set for ’67-’68 Mustangs. Some of their other bolt-in systems include C10 pickups, Ford trucks, and a system called the Bel-Era for the ’55-’56 Chevy which is what piqued our interest.
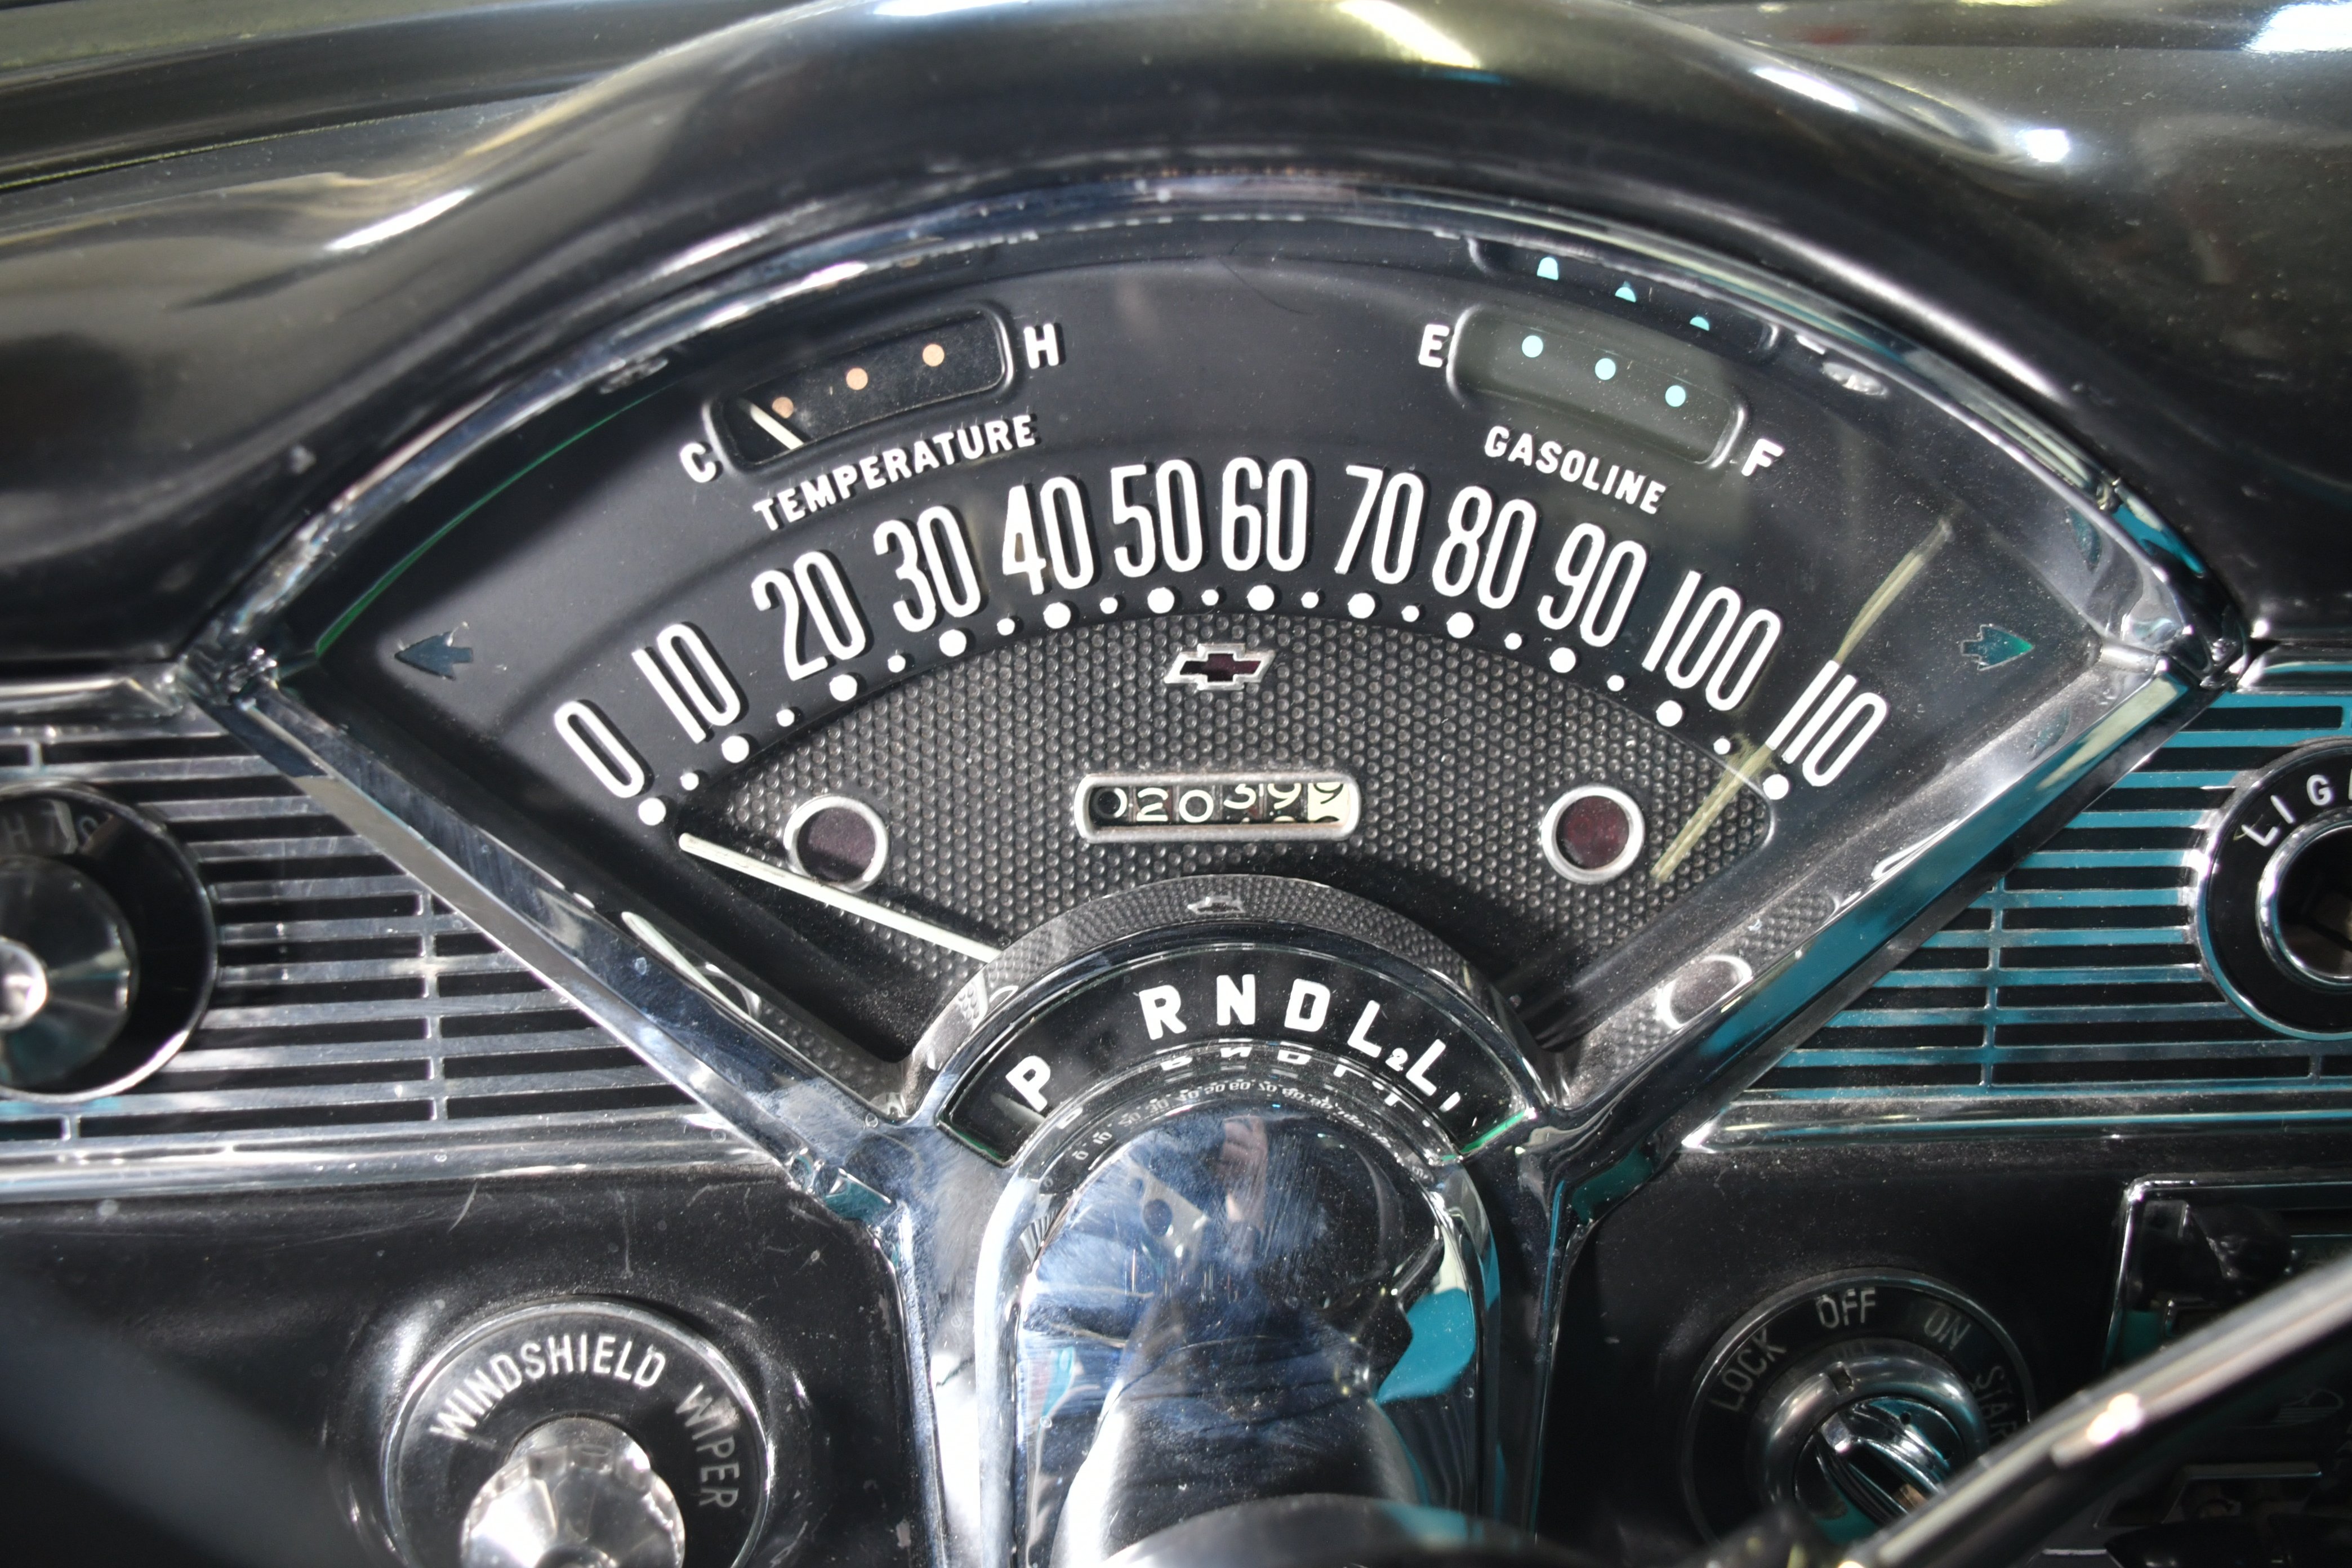
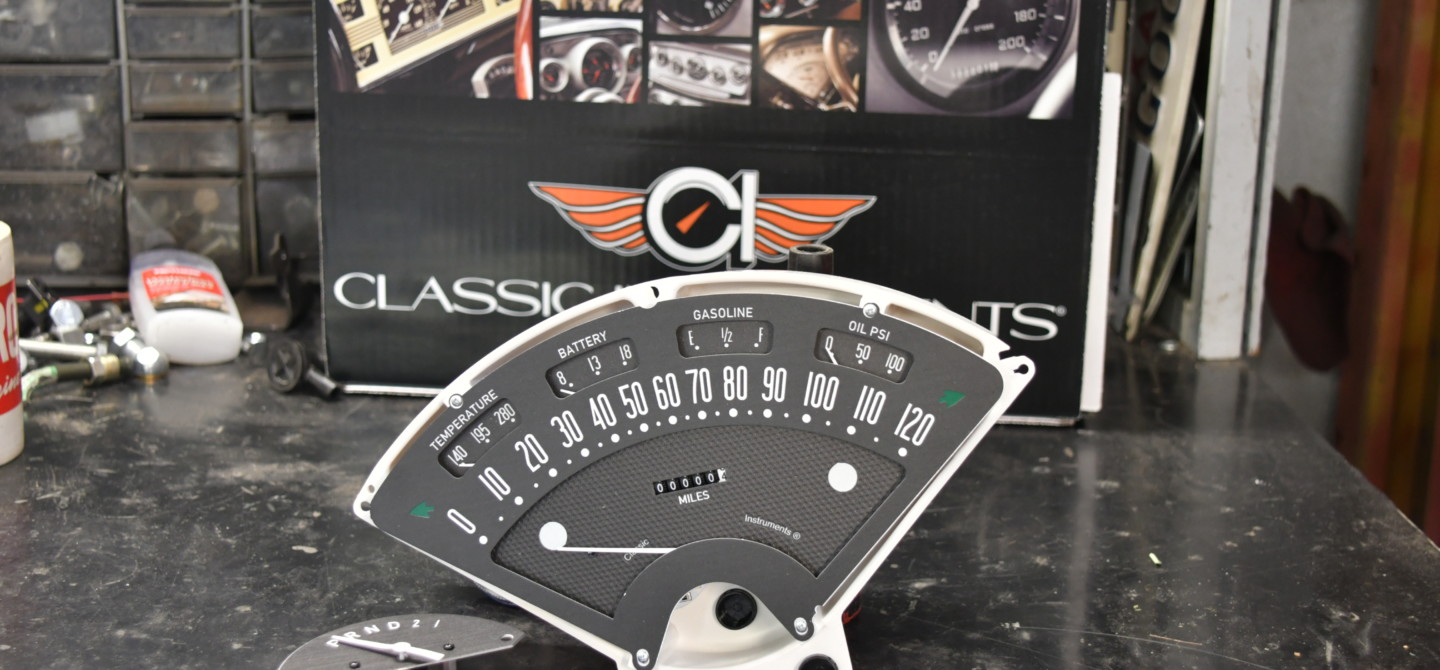
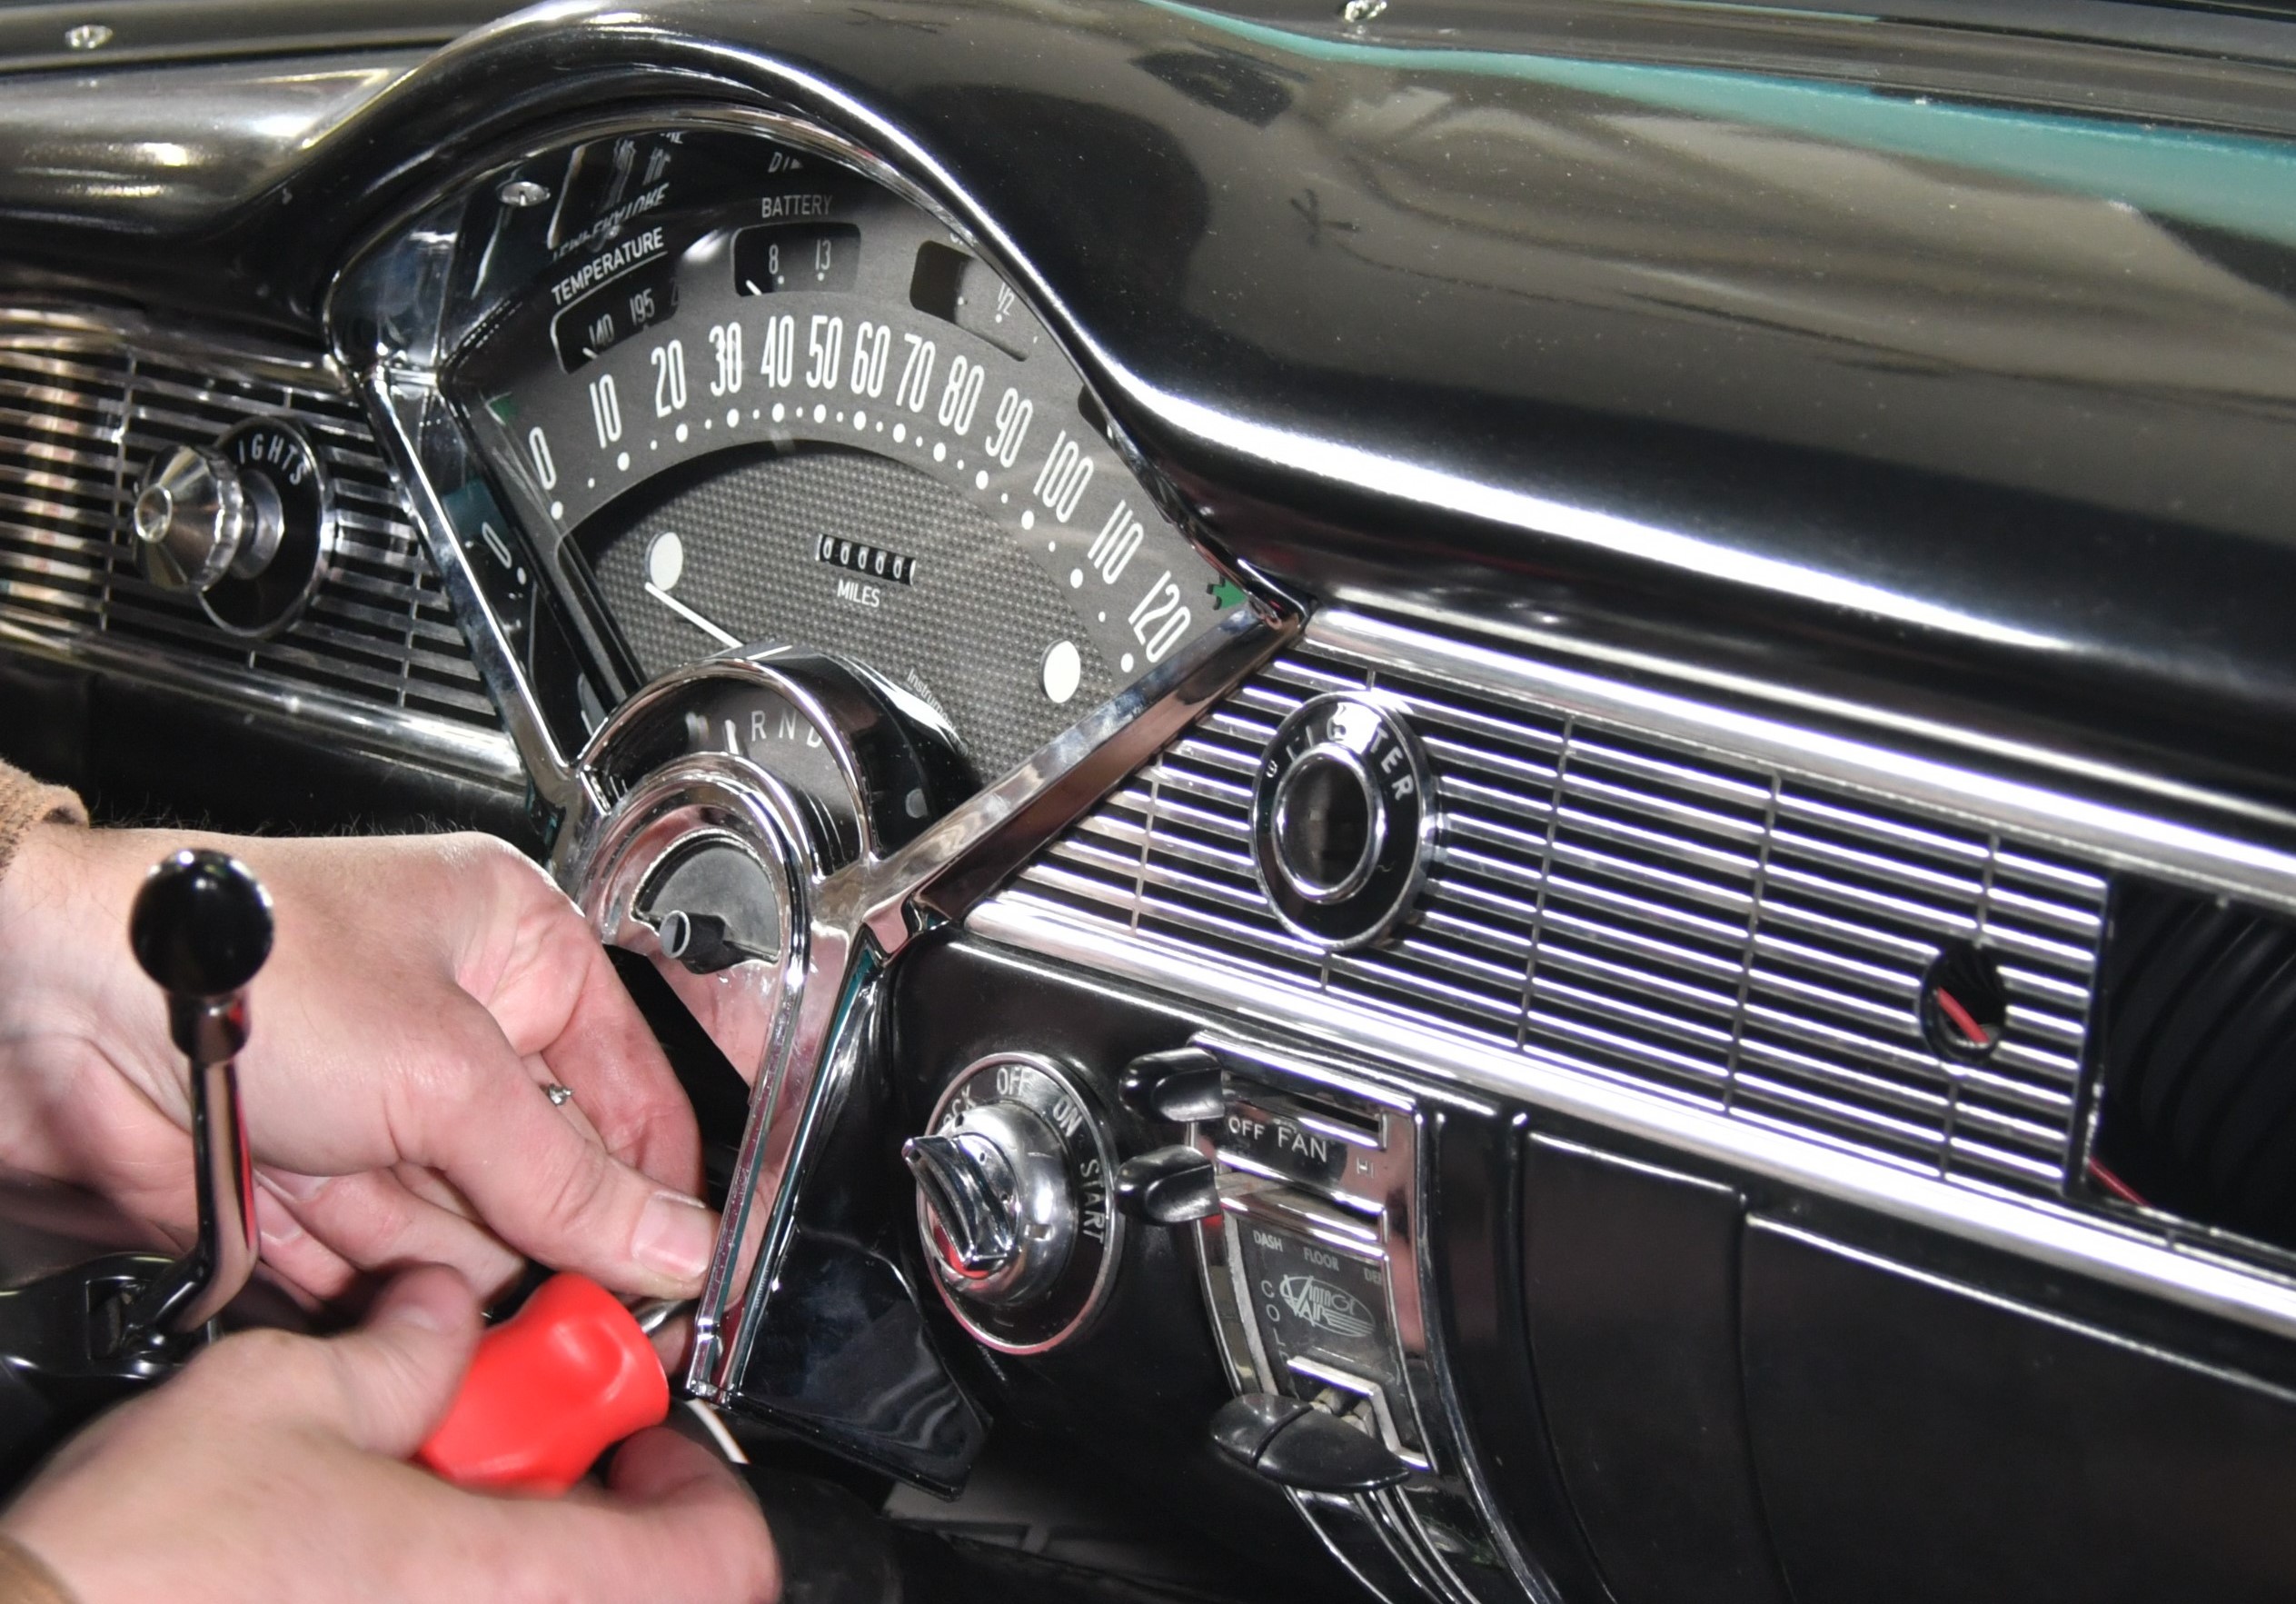
As a reference, here’s what the 55-year-old dash and gauges looked like. Fuel, temp, and speed. The Bow-Tie-shaped high beam indicator will be missed, but having the extra gauges, LED lighting and electronic speedometer far outweigh our nostalgia for the shape of the indicator.
The Bel-Era is available in three platforms, each designed to bolt into the stock dash, but with distinctive styling. We opted to go with the Bel-Era III, which has the most OEM styling and is not available with a tach. The Bel-Era II offers a unique design with a different style speedo along with a centered tachometer. Their first model provides a full set of gauges, tach, and speedo. Each design is available in different colors and options but they’re all ready to install in a ’55 or ’56 Chevy car.
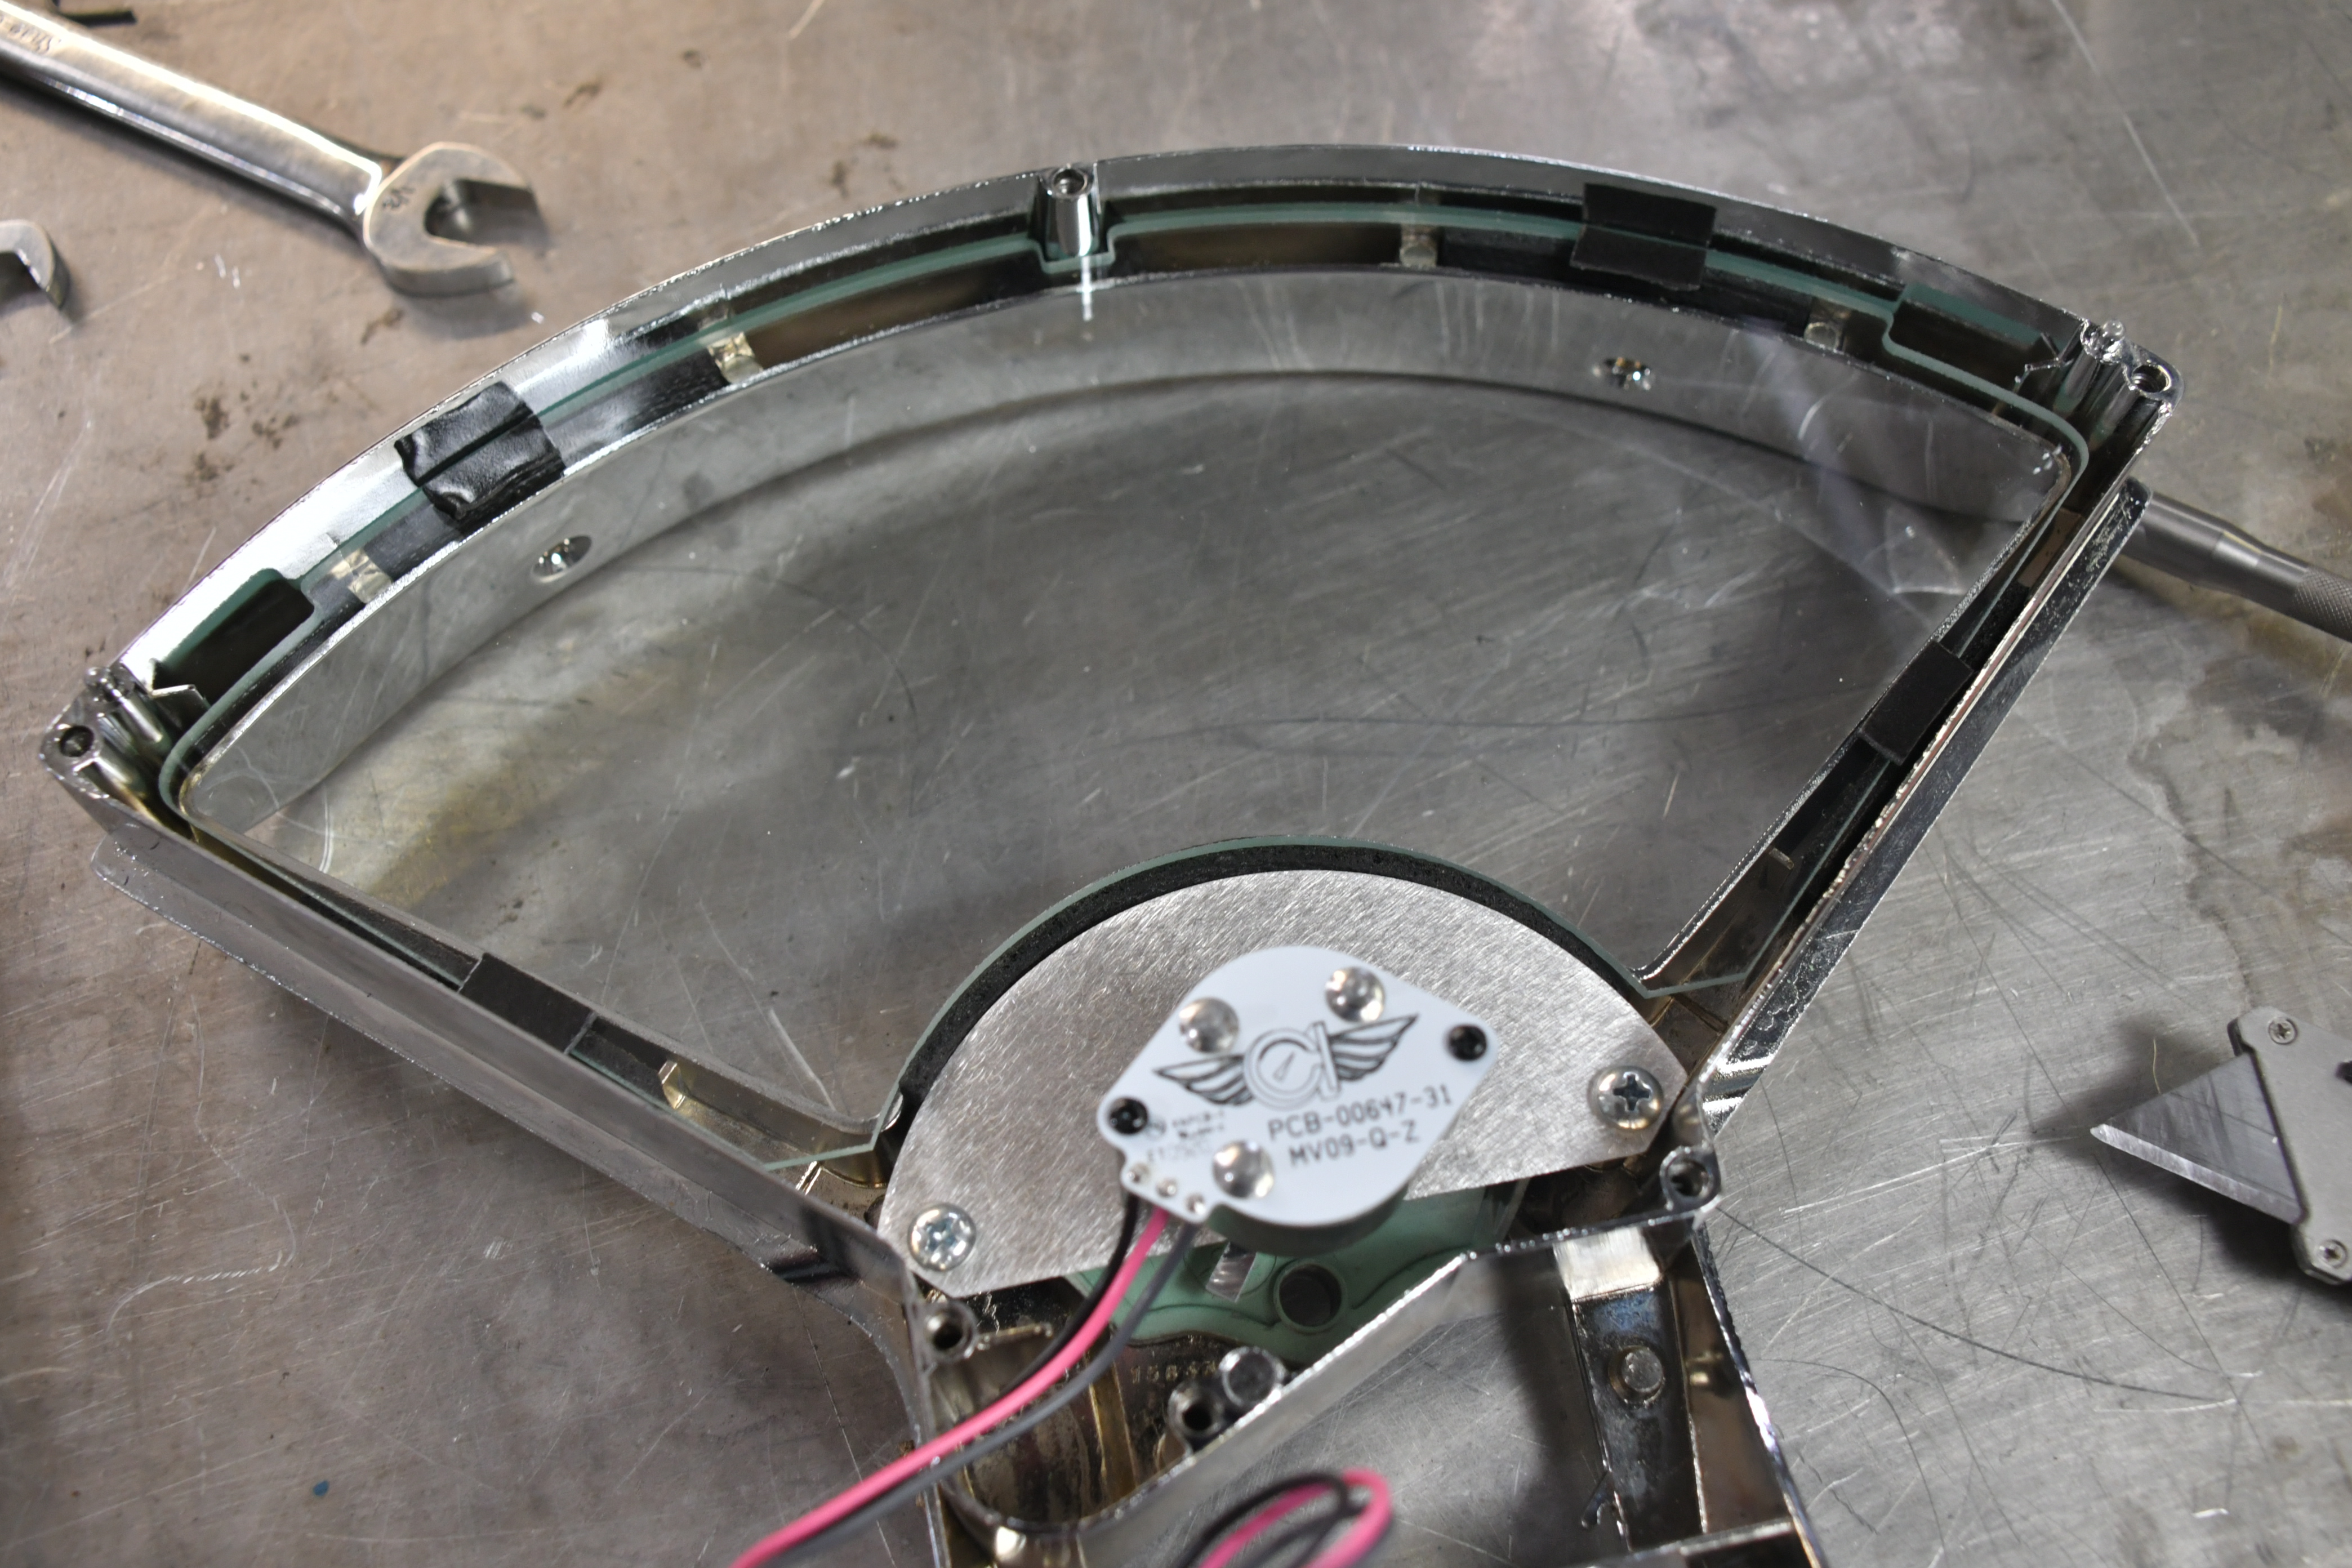
You’ll be using the original bezel to mount the gauge assembly, though Classic does supply a new piece of glass. Here we already installed the optional electronic gear module and the glass in preparation for the gauges. Make sure to clean the glass before assembly!
Regardless of which model Bel-Era dash you choose, each is supplied with sensors for oil pressure and coolant temp. If needed, a signal generator is also included depending on what transmission you’re running. The nice thing is that the speedometer will function with any transmission and driveline setup as well as the tach (if equipped) and the fuel level sending unit.
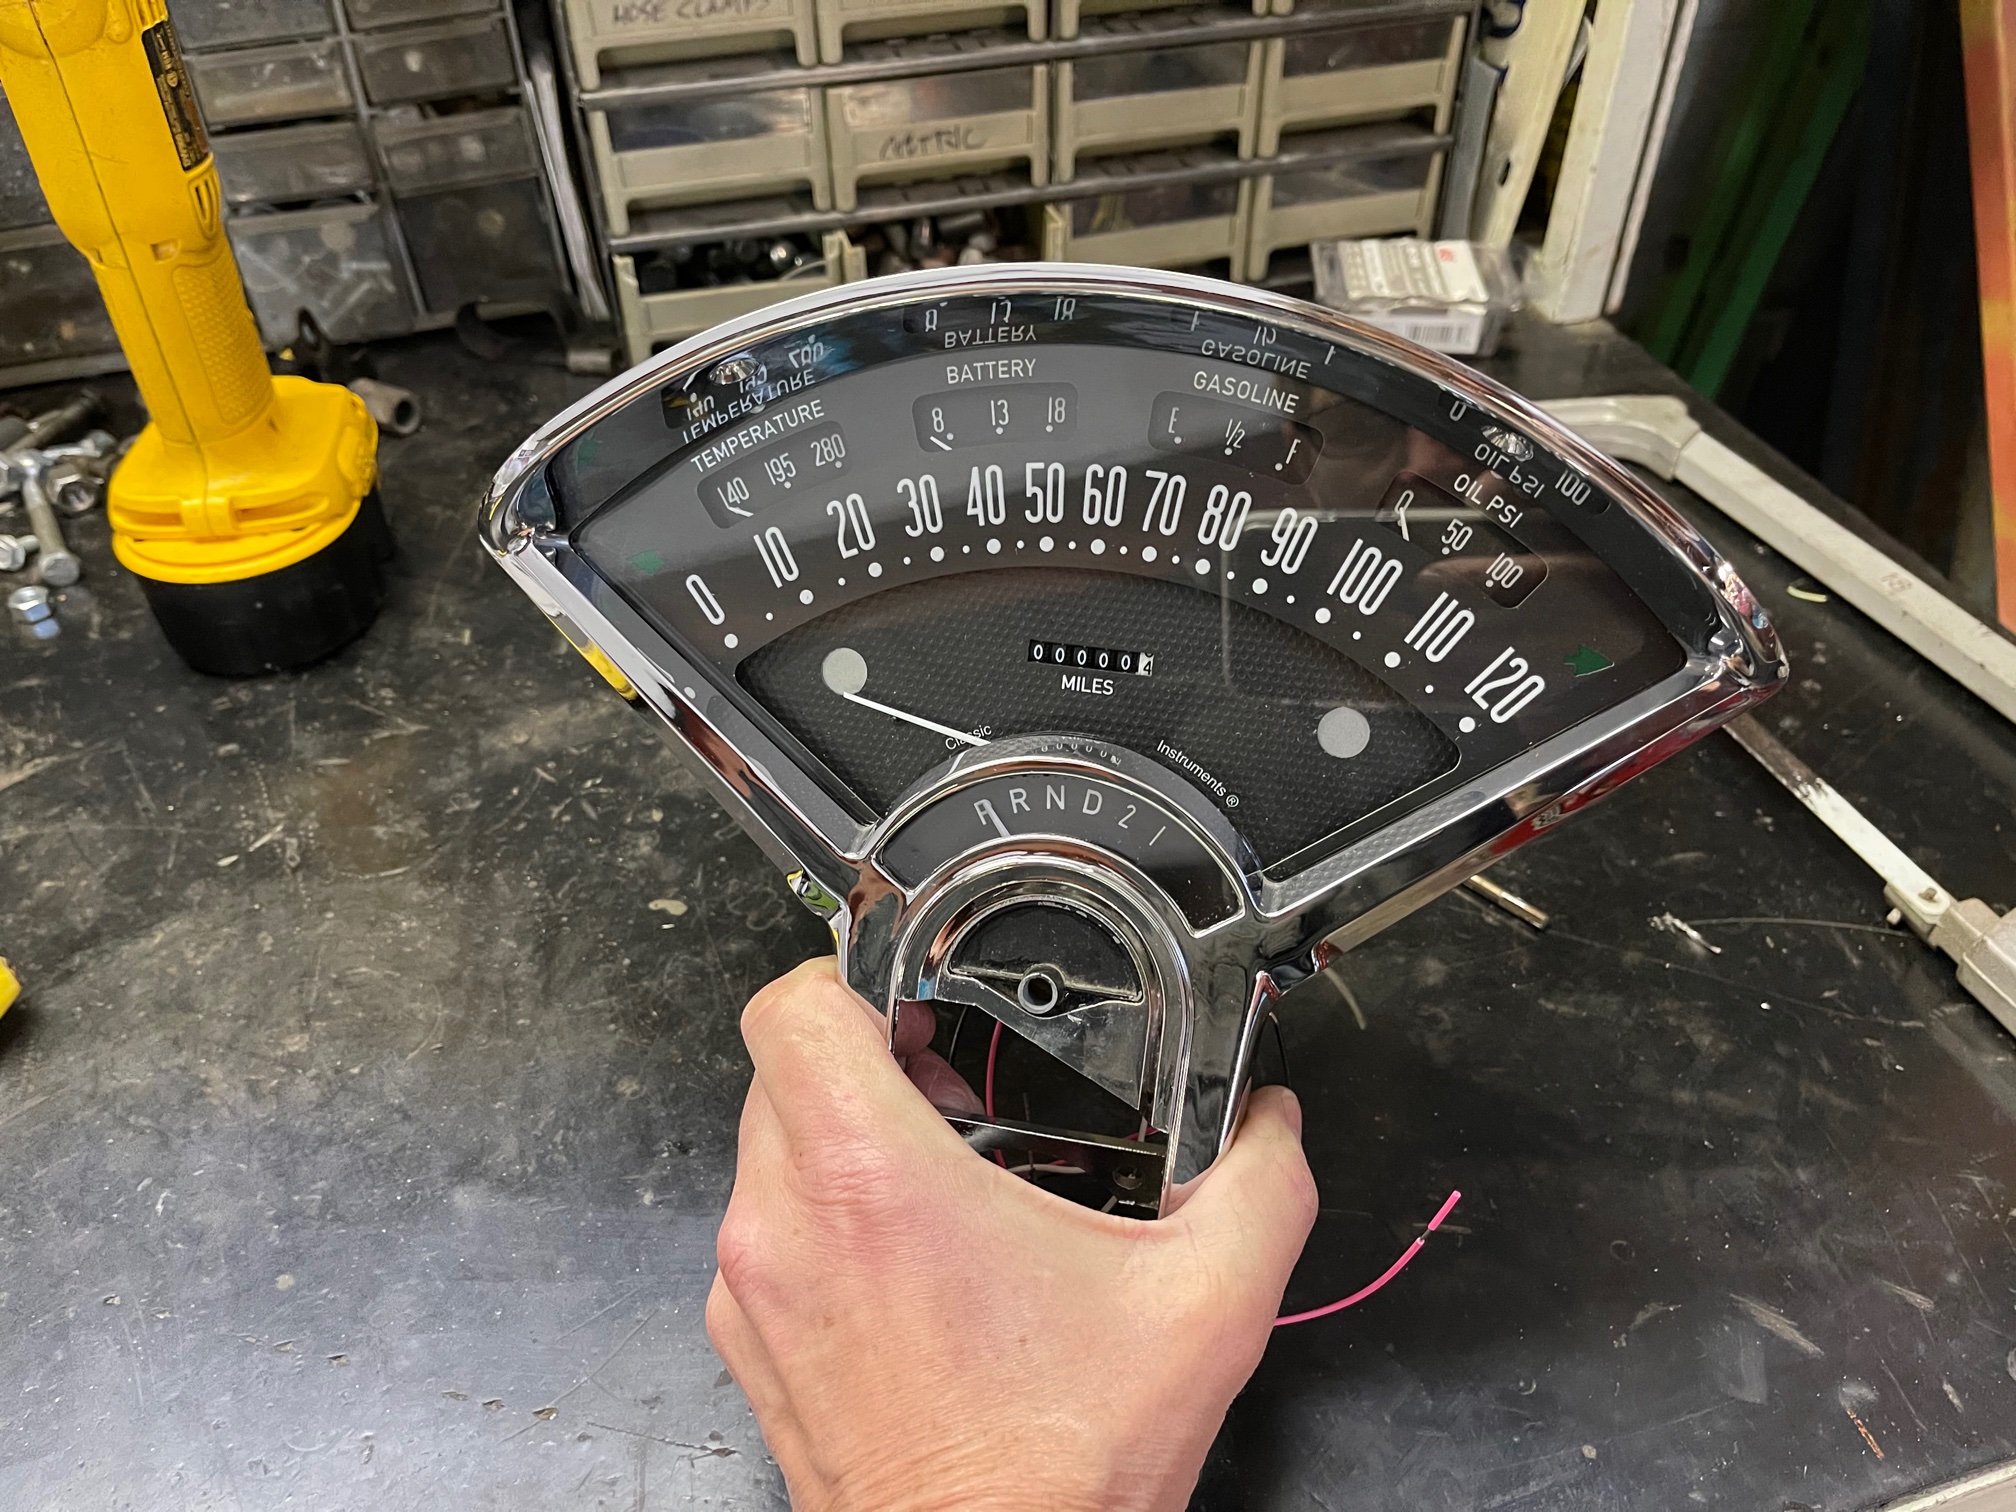
Just seeing the new cluster assembled in with the chrome bezel got us excited. Factory styling with a full line of gauges along with LED lighting and an analog-style odometer – just what this tri-five needed.
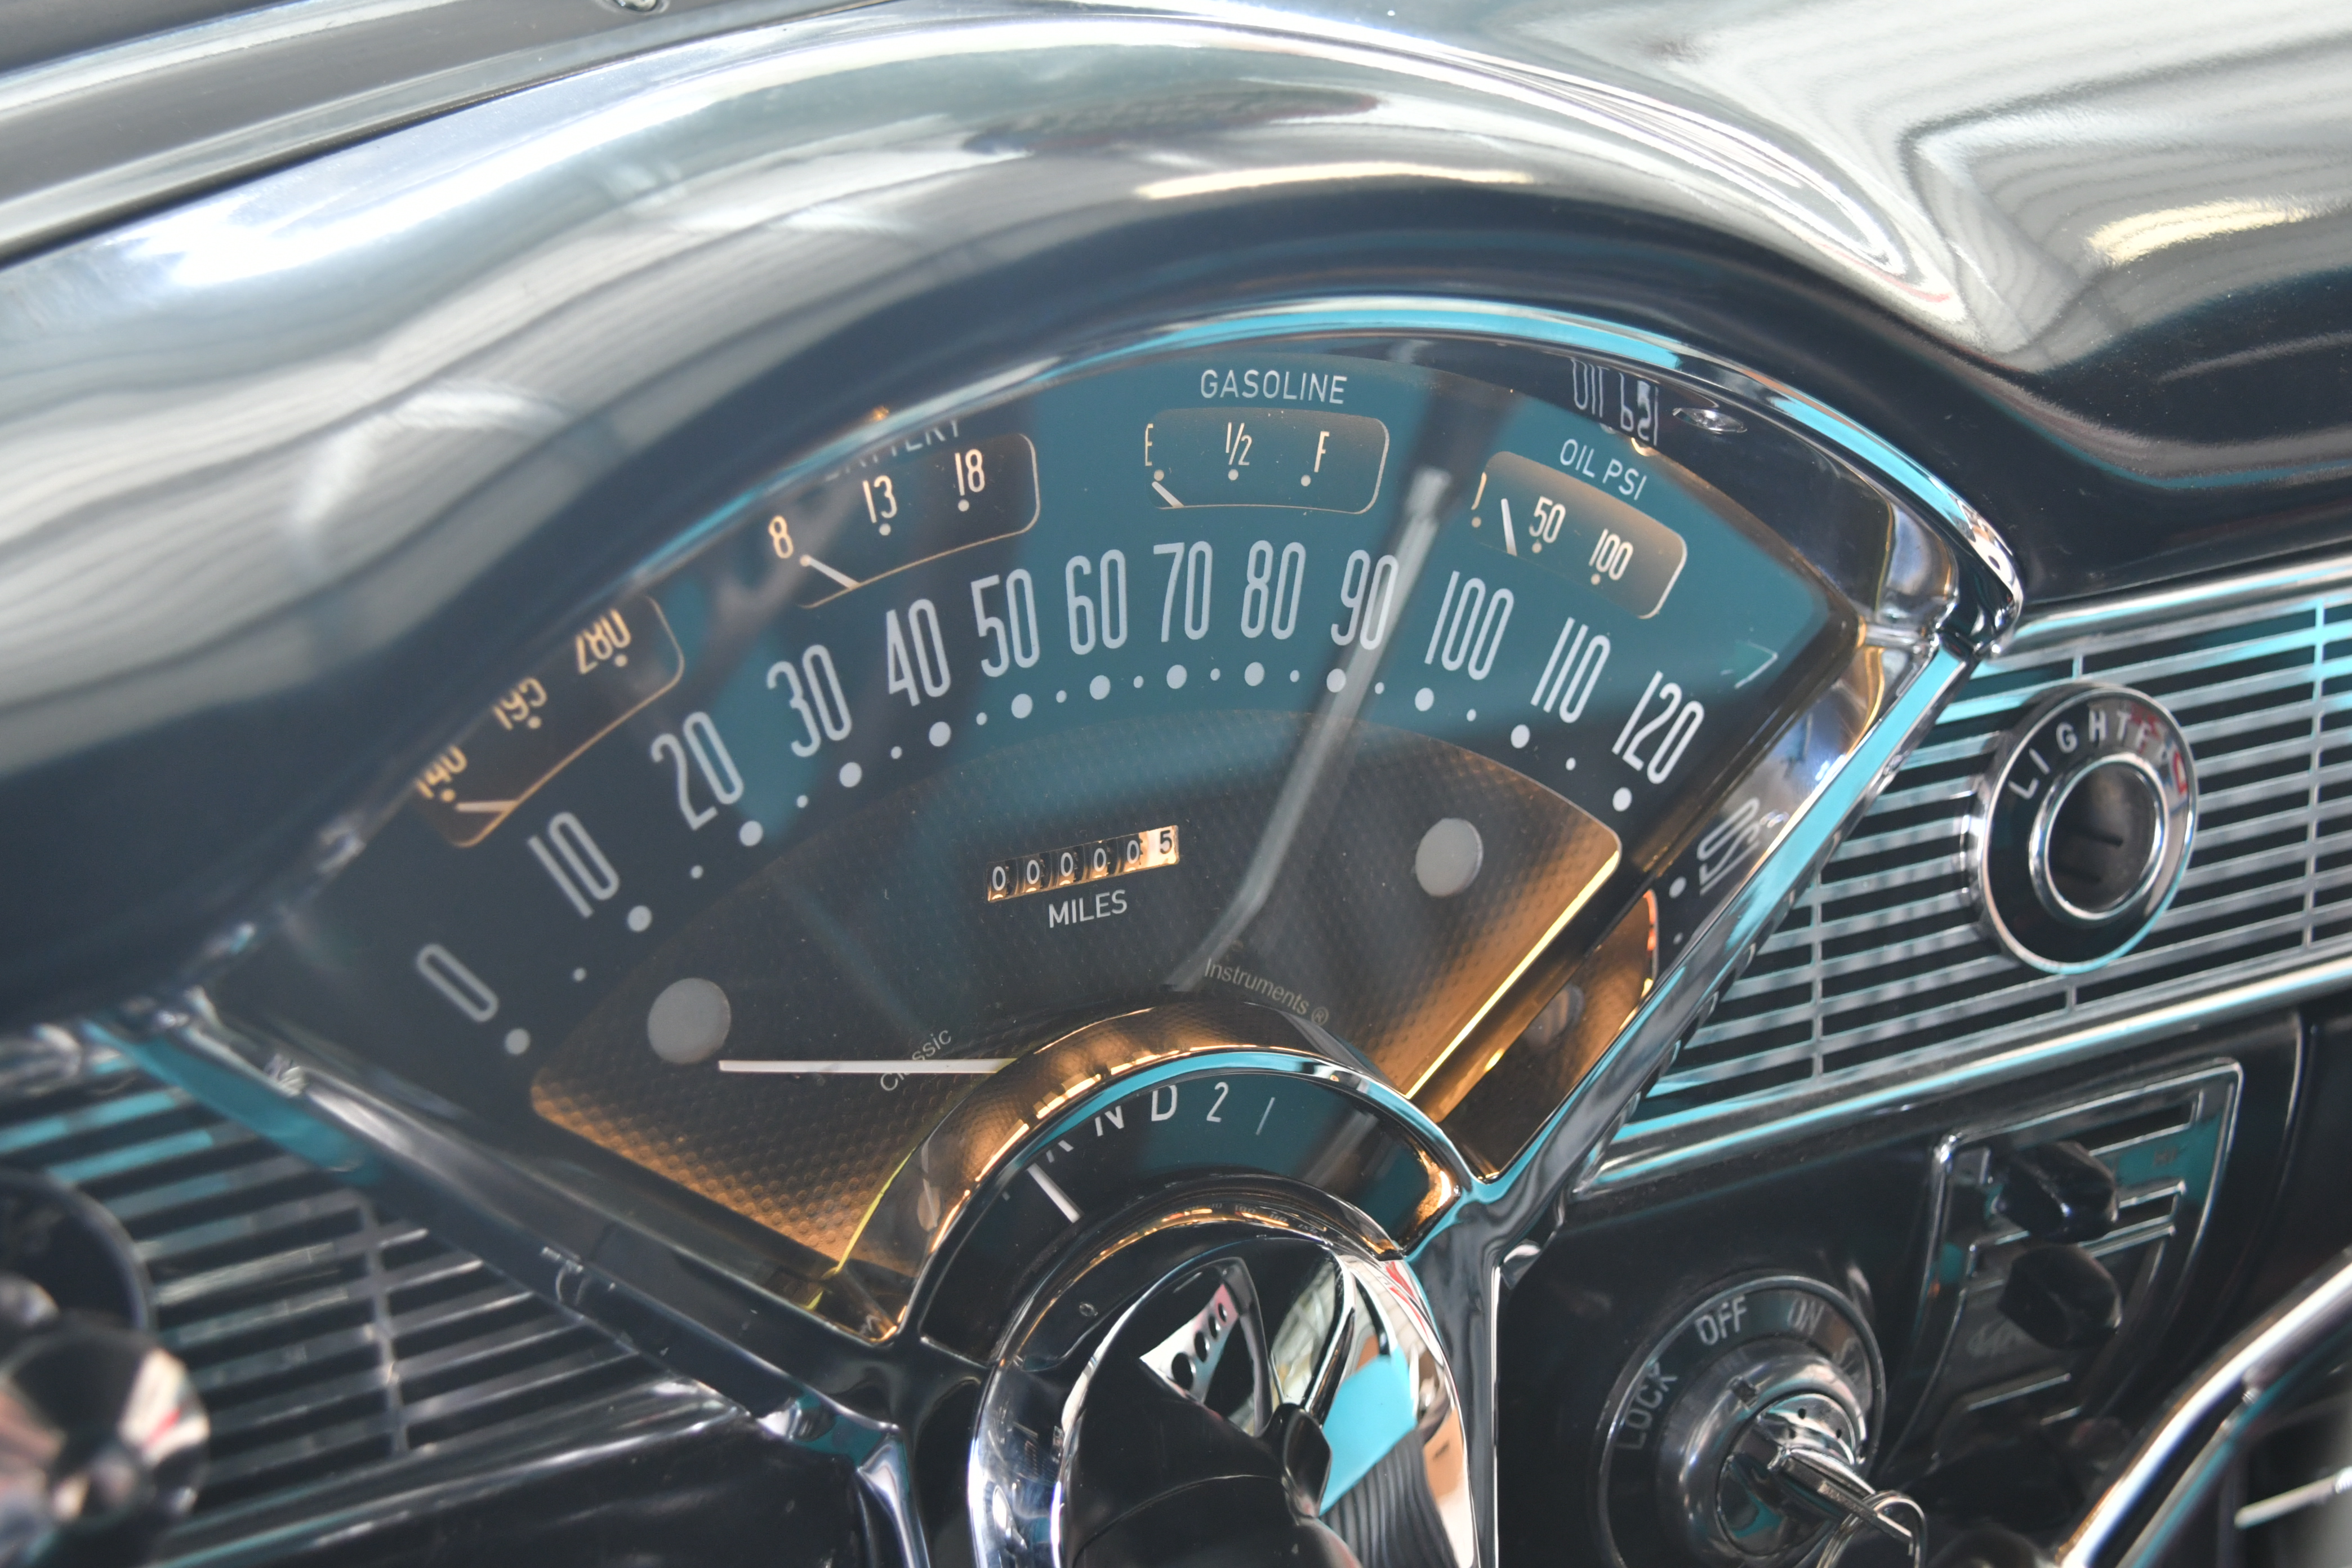
For the Bel-Era series, you’ll be using the factory (or aftermarket) chrome bezel but Classic includes a new piece of glass. You’ll notice that the gauge assembly is housed in a sturdy injection-molded housing which provides a strong mount for each gauge and a secure mount onto the bezel. Another nice feature is the single connector that routes to all of the wiring, easing the installation process.
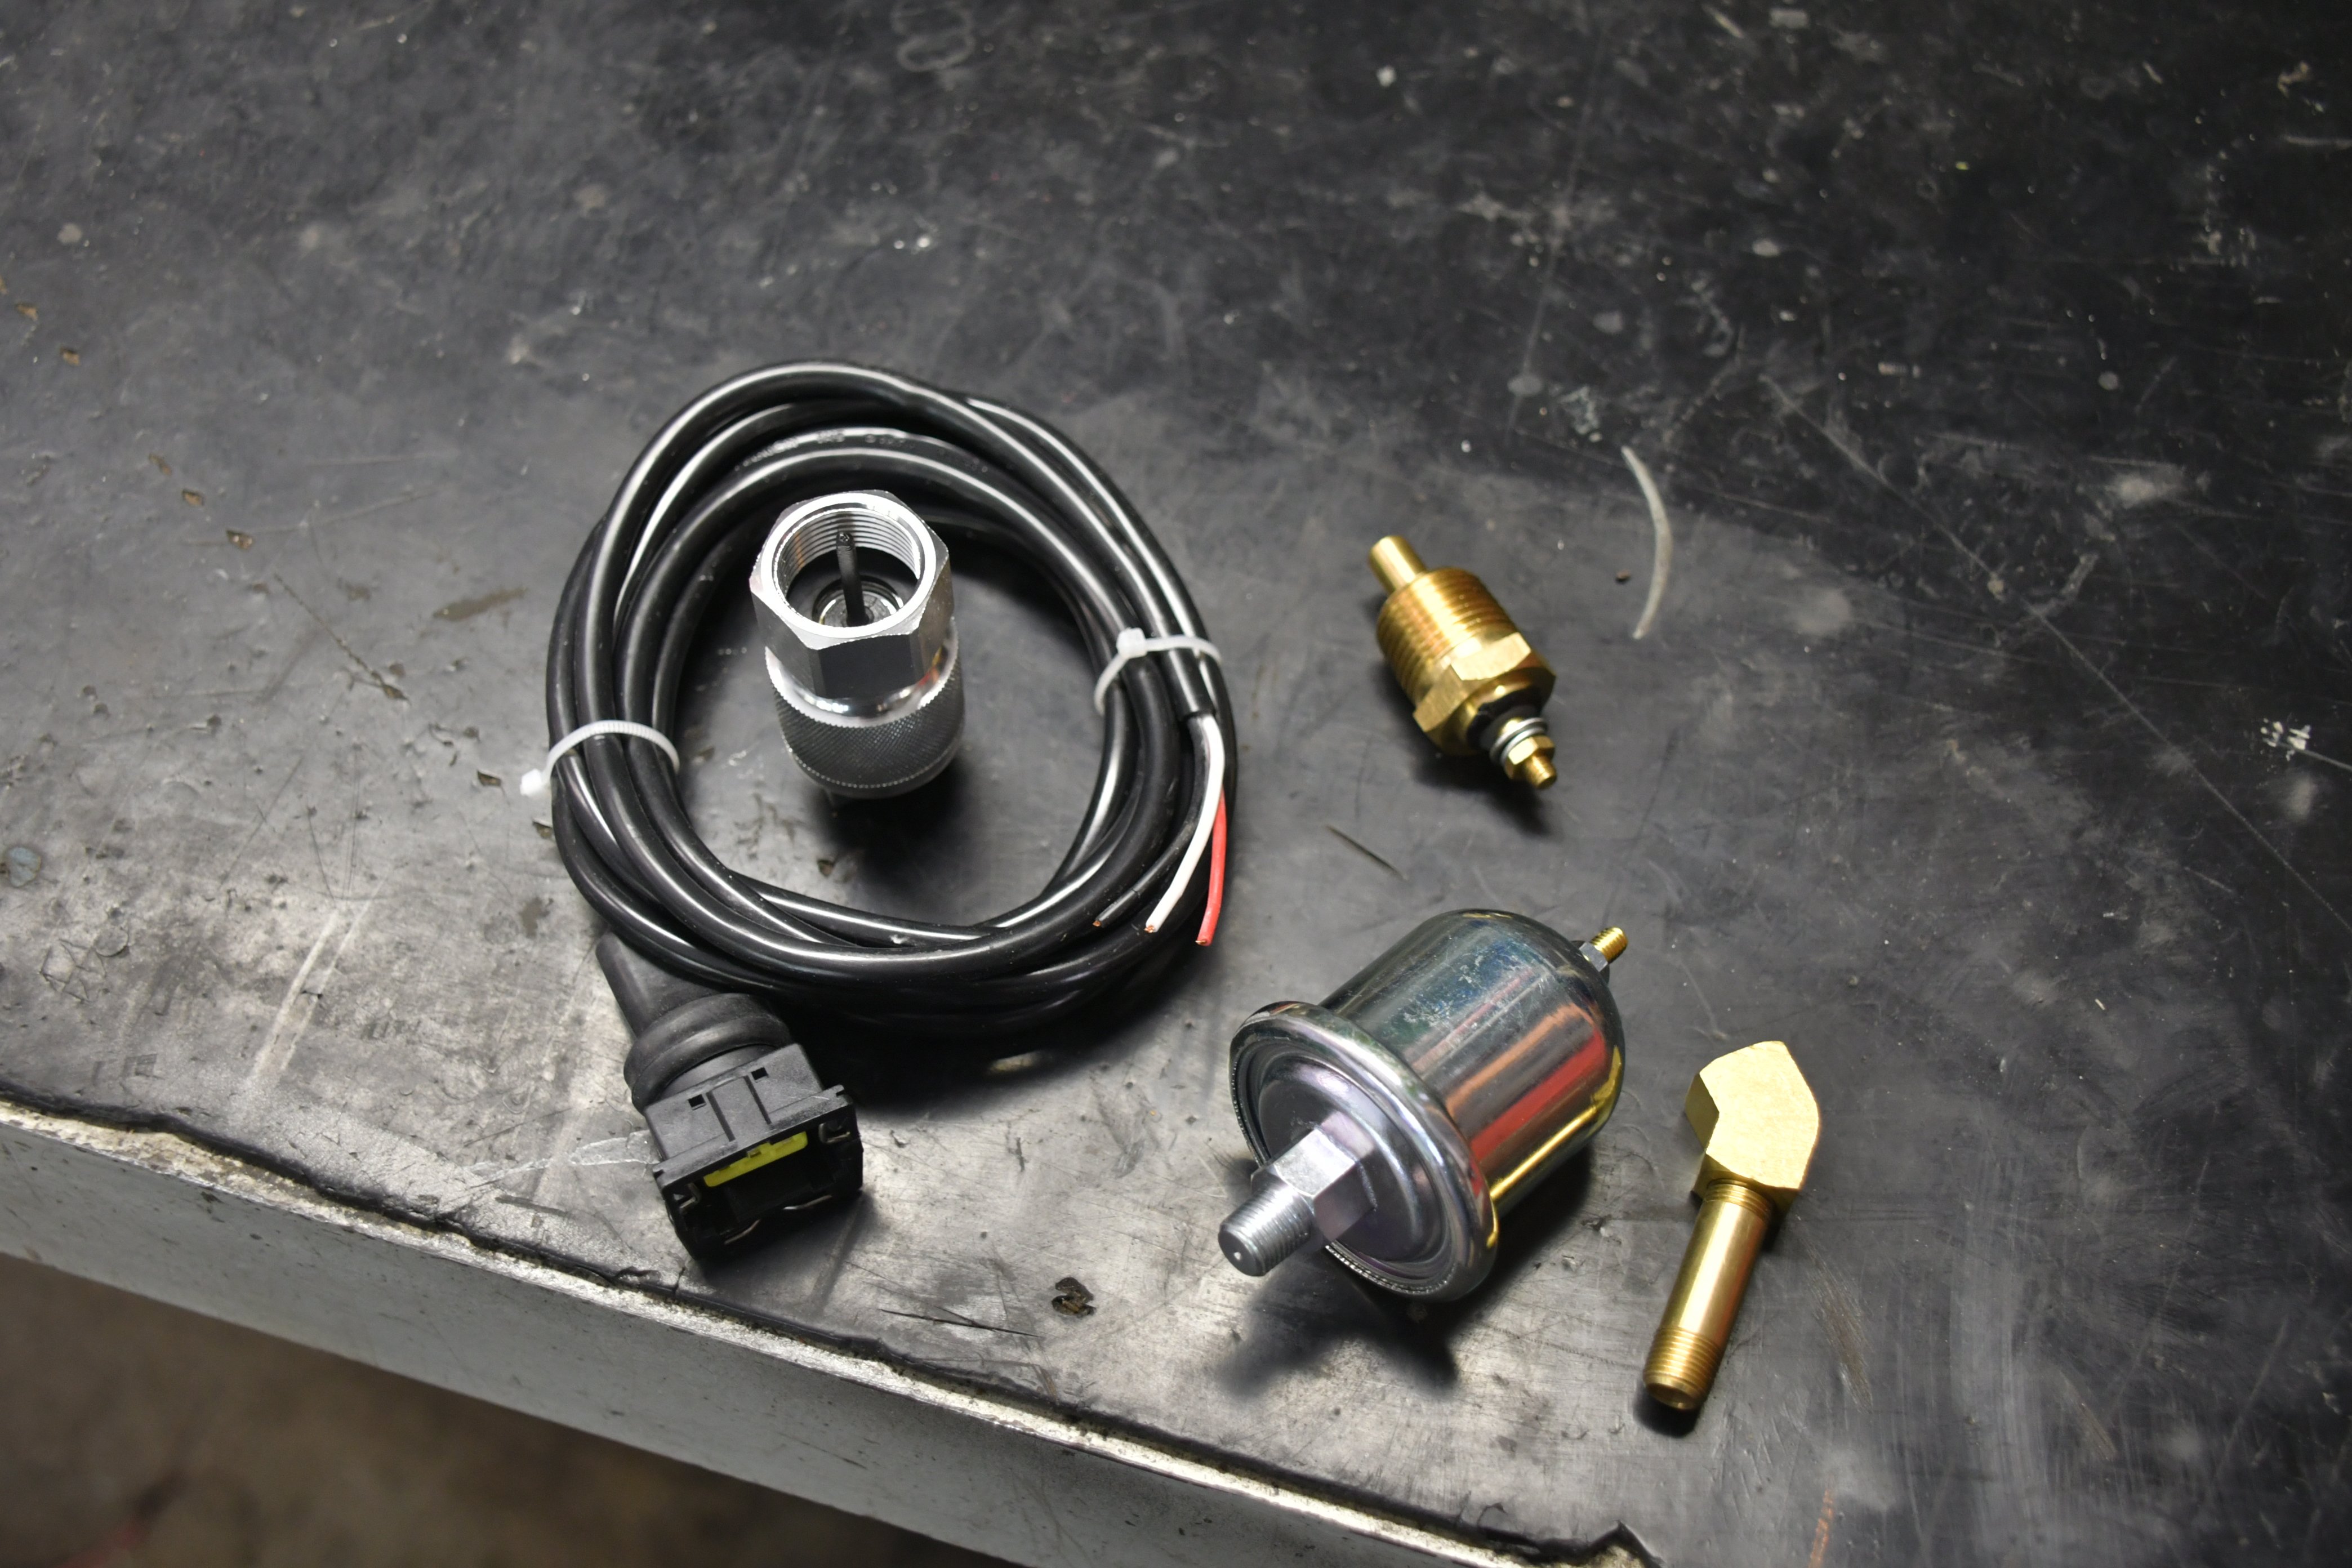

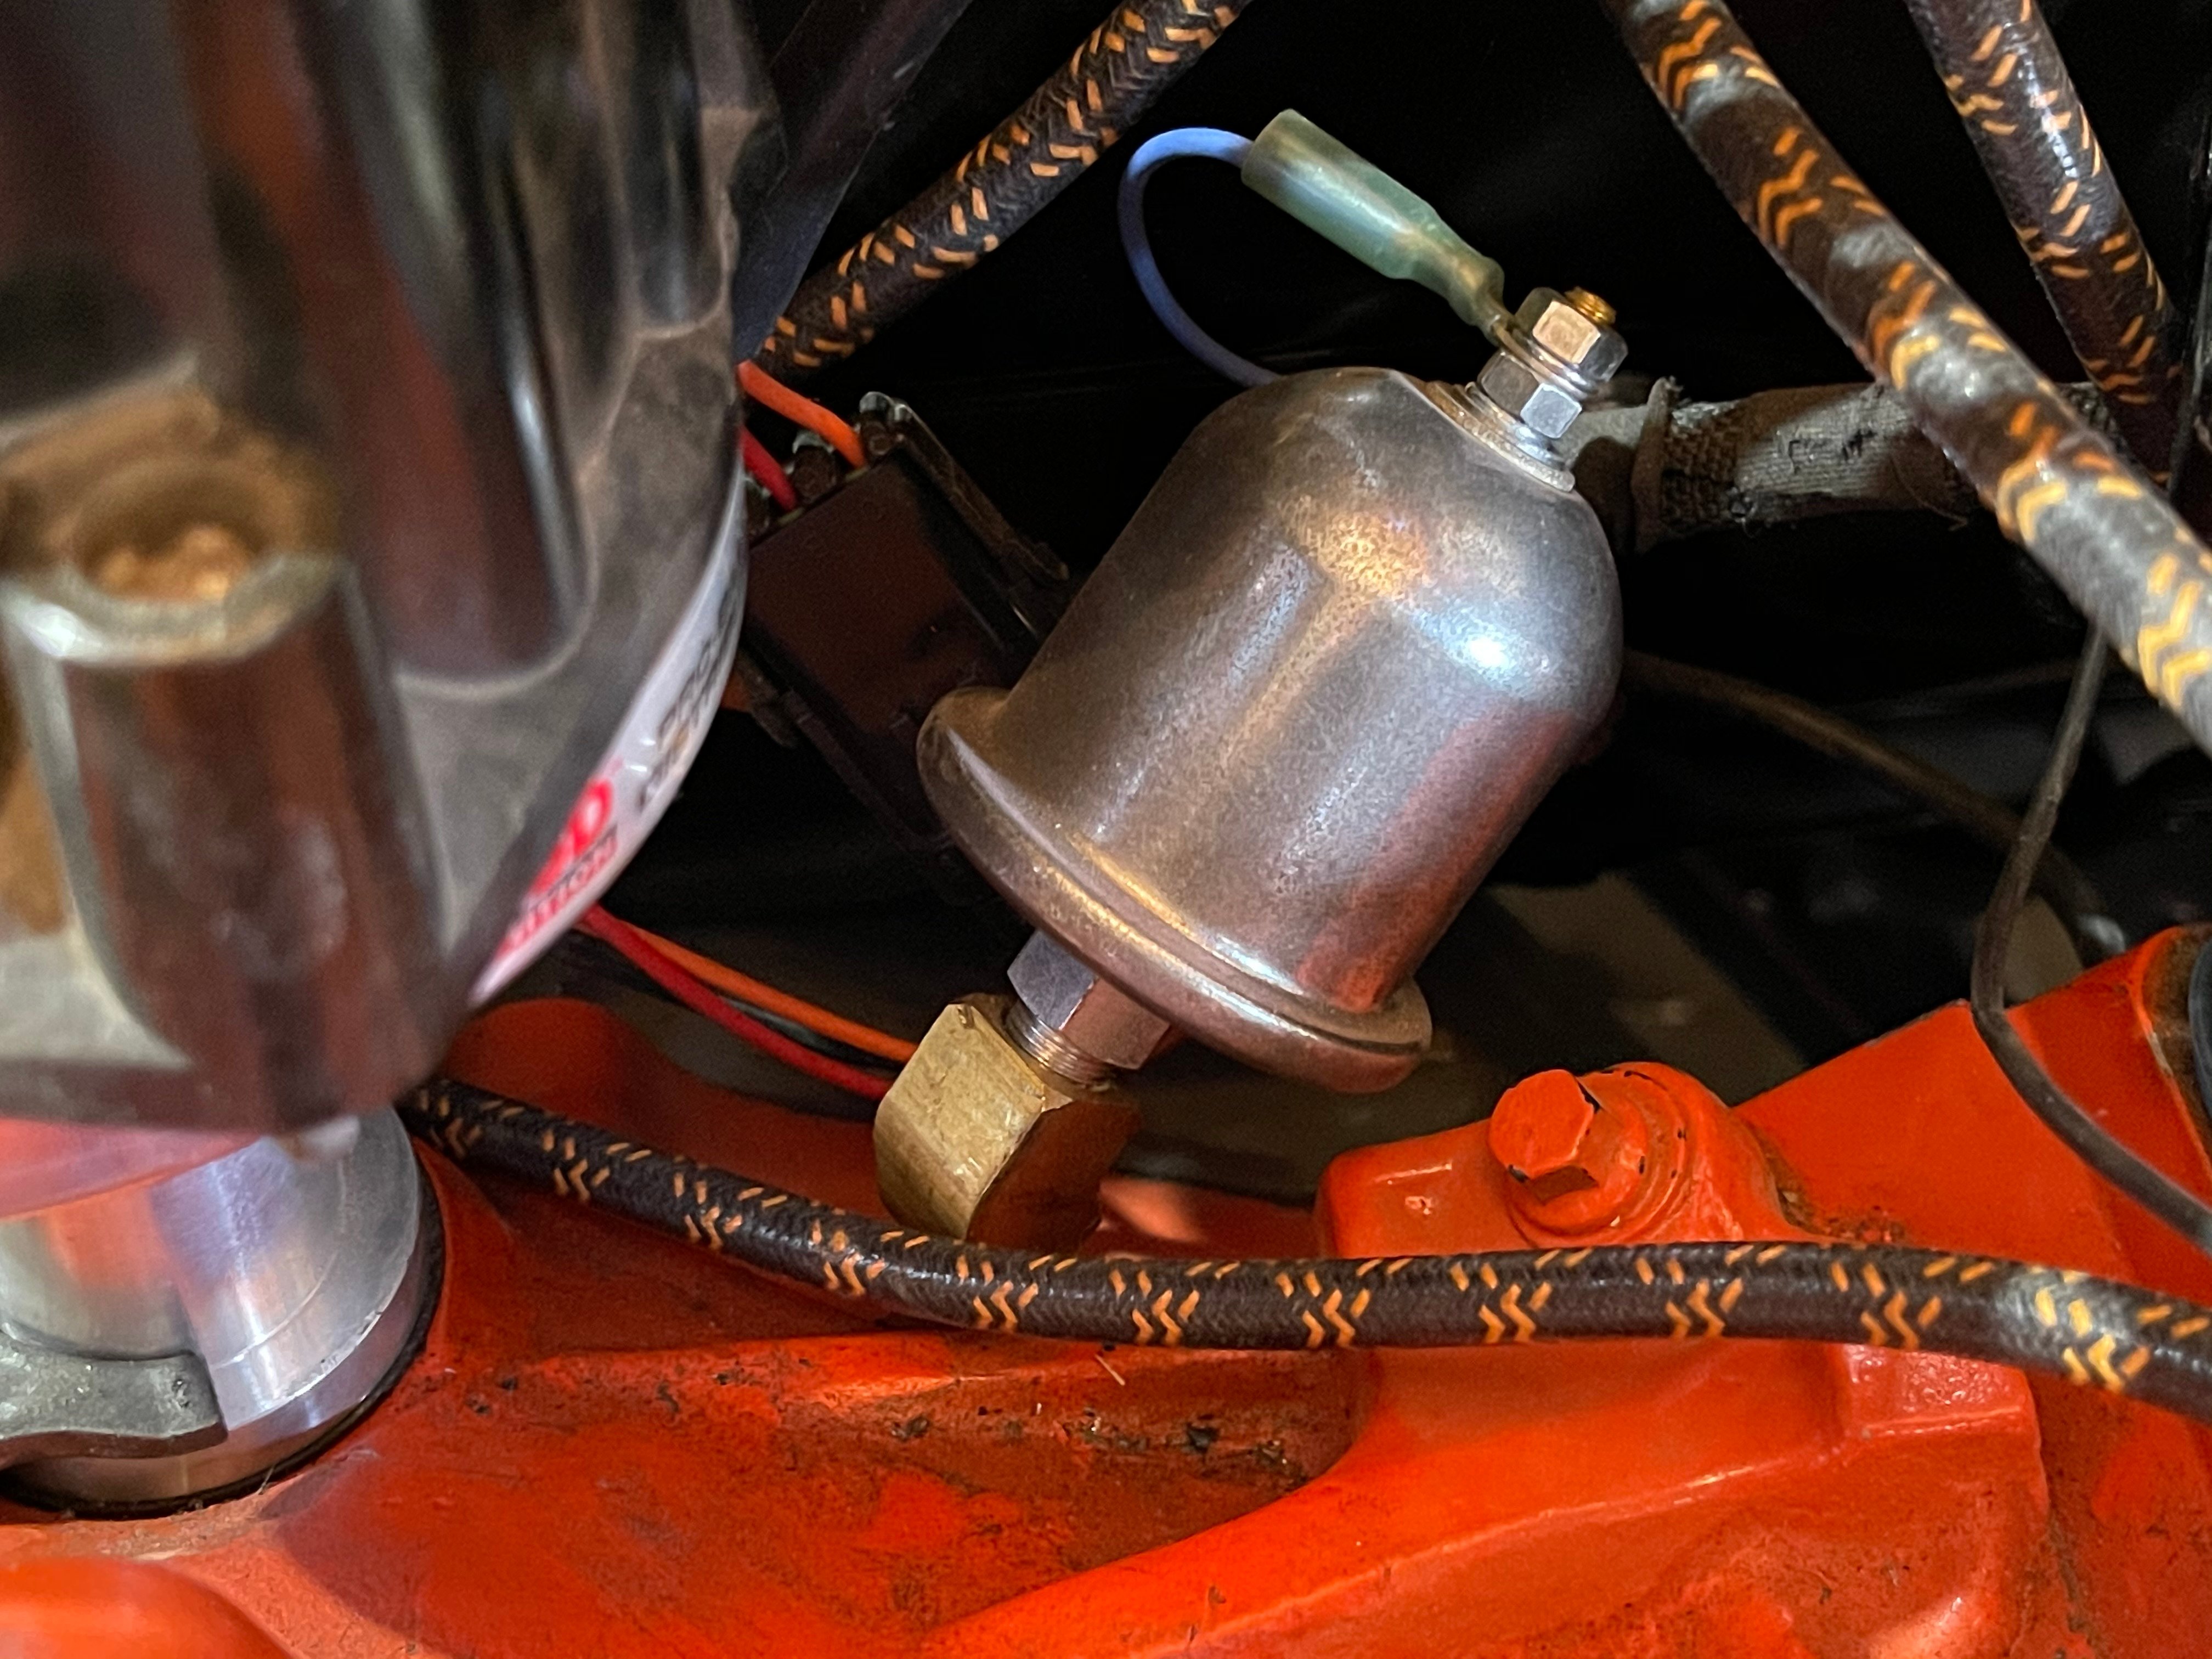
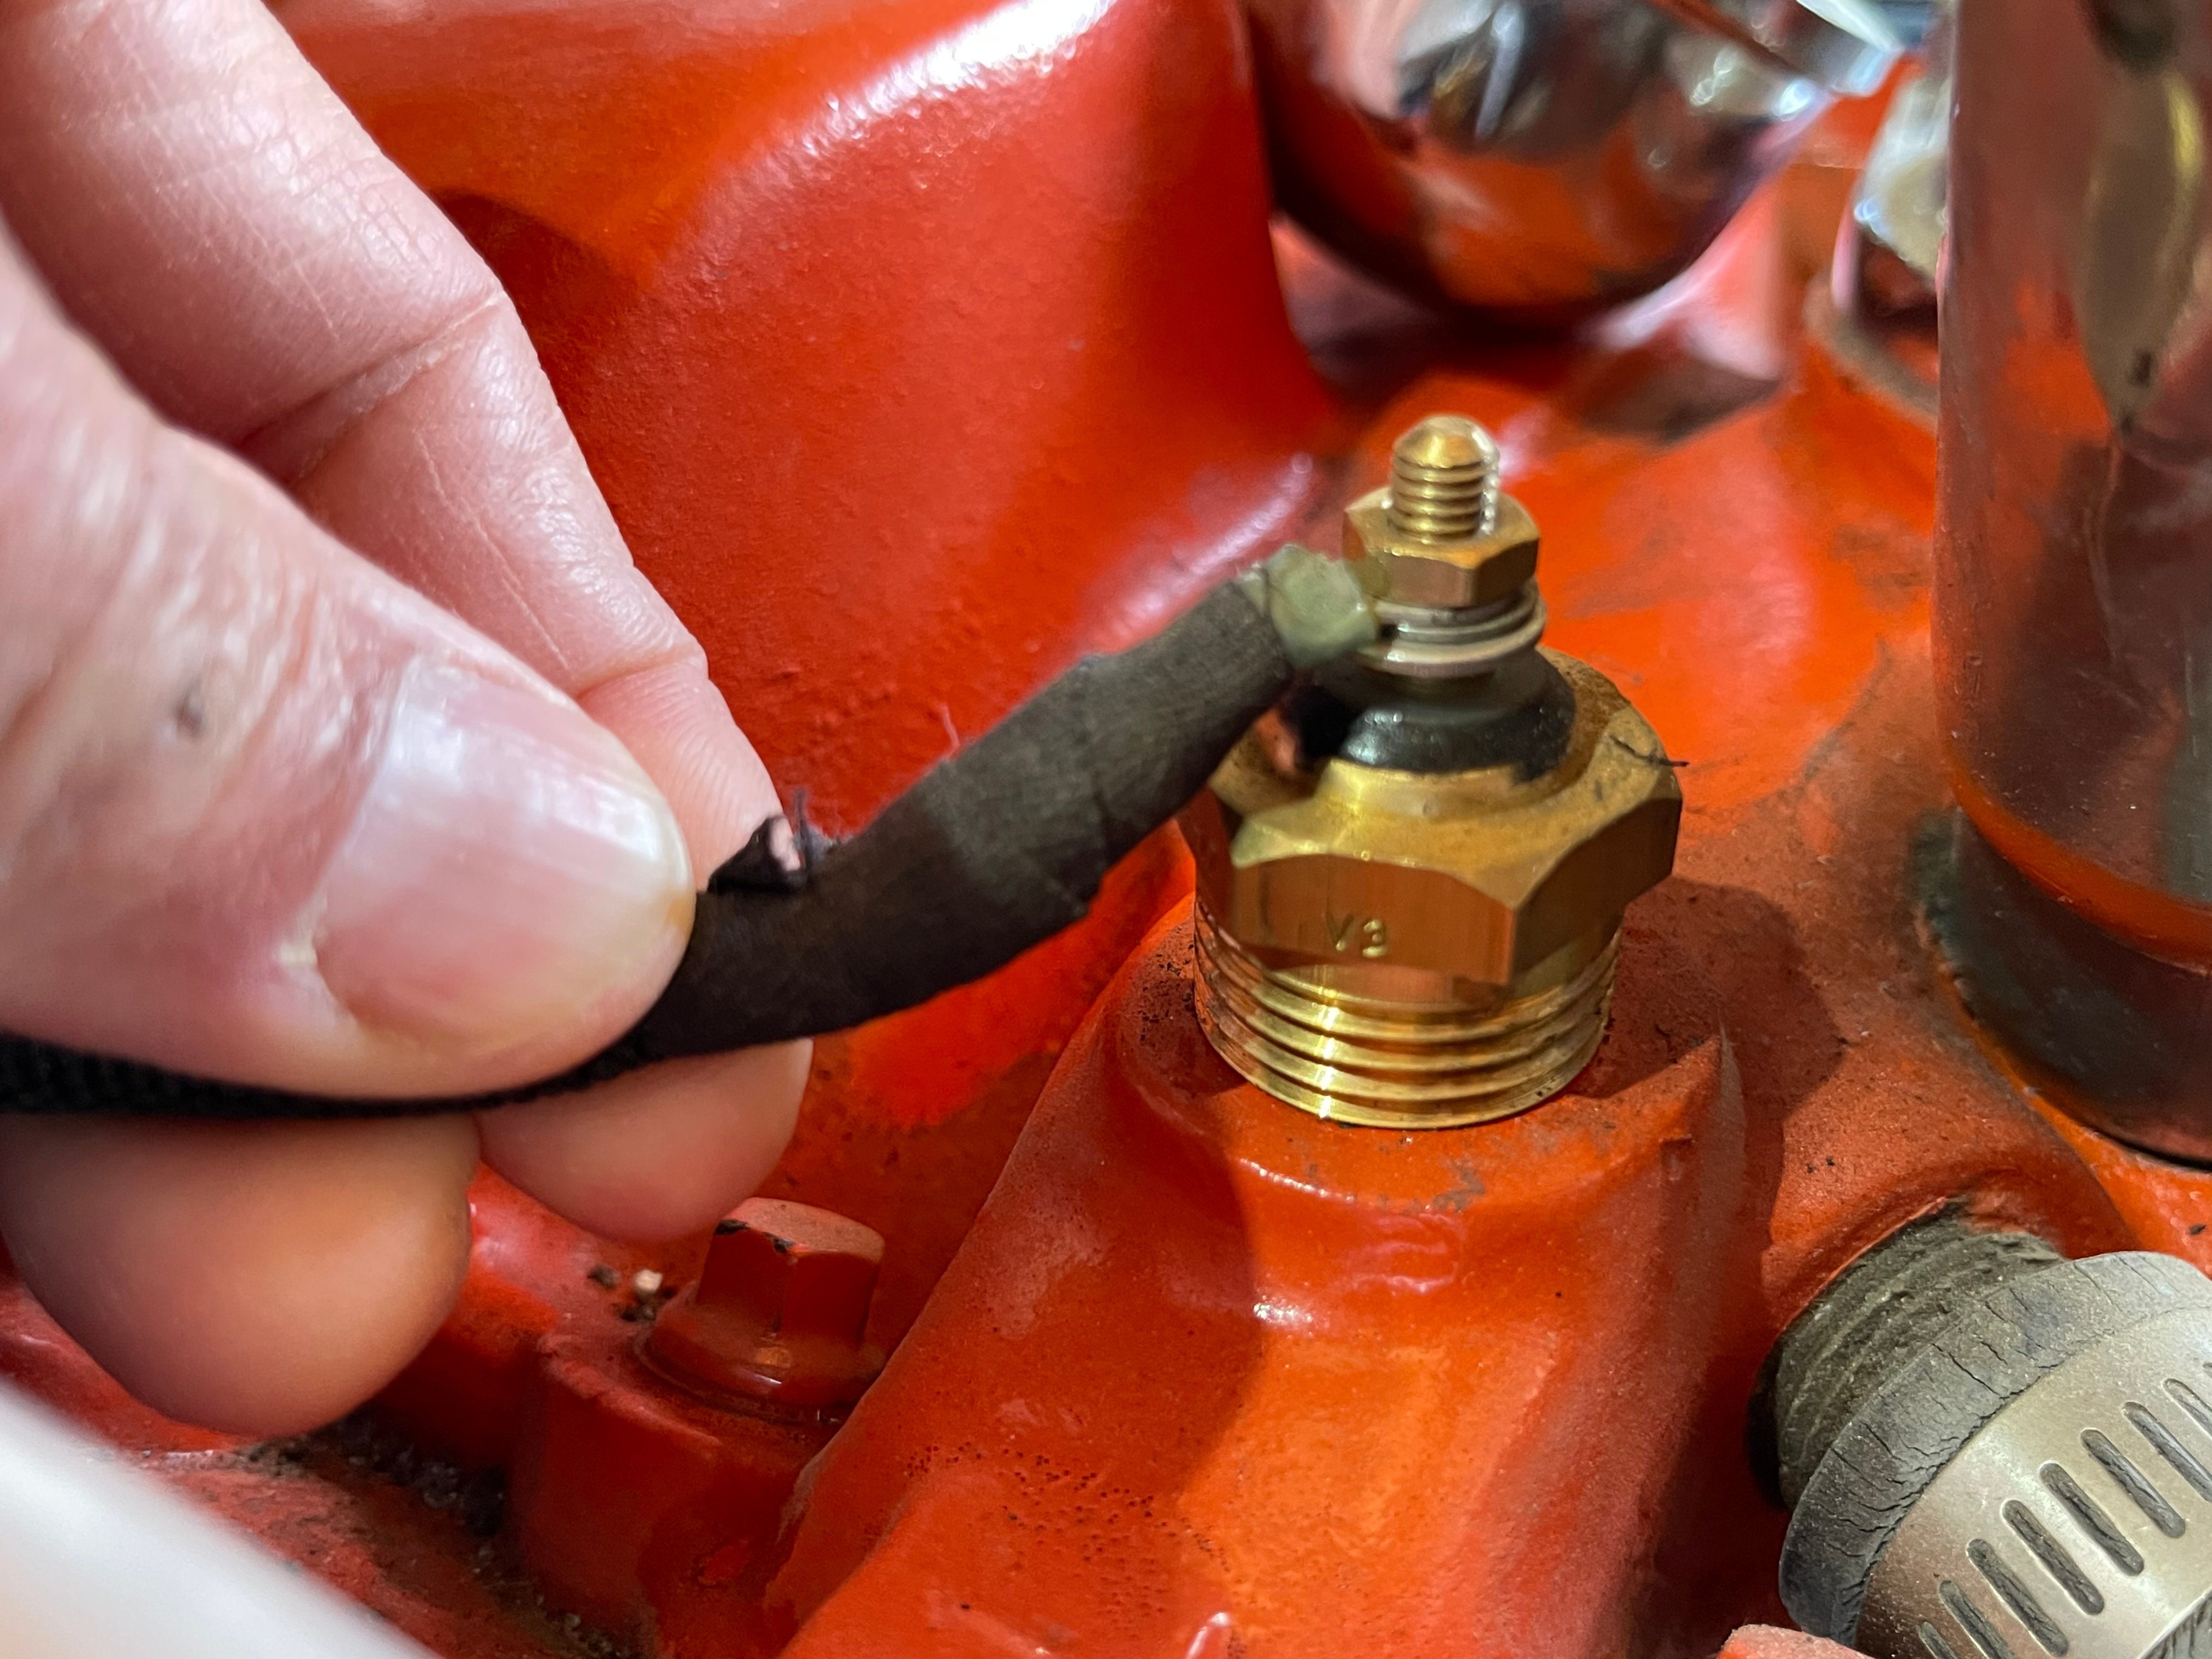
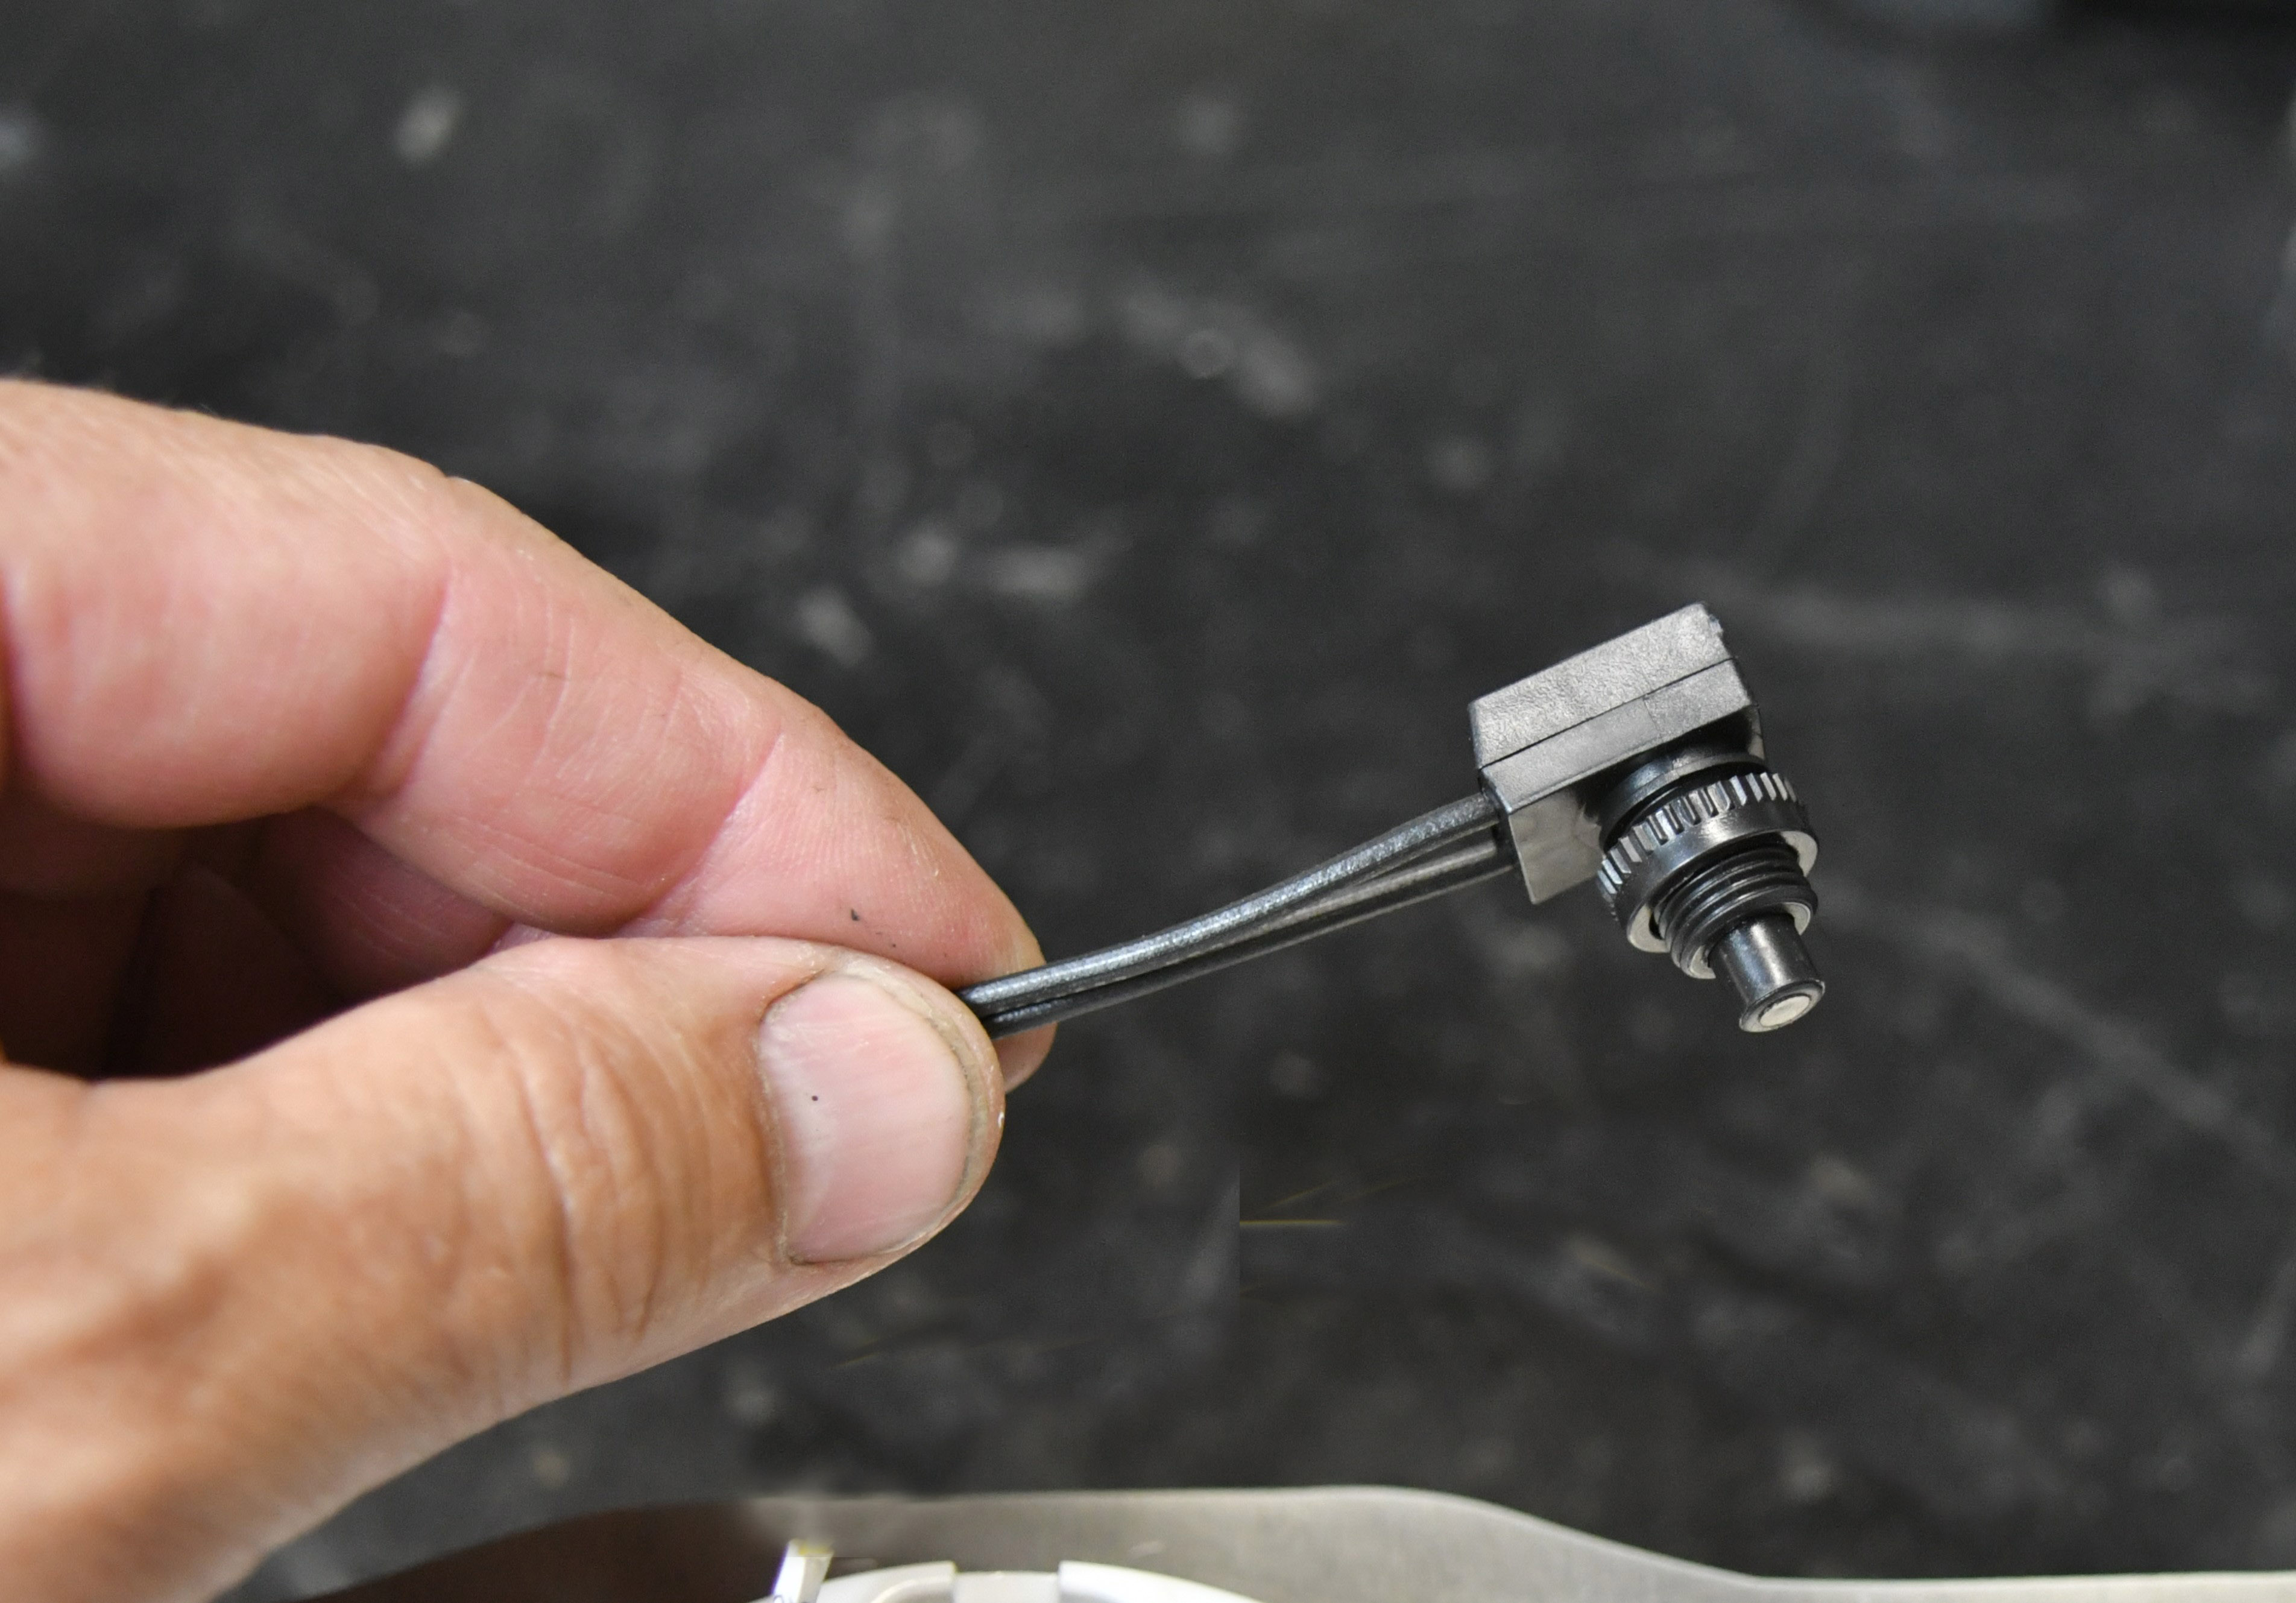
New sensors are included for oil pressure and temperature. Depending on your transmission, Classic supplies a signal generator that converts the mechanical signal to an electronic signal for the new speedo. A 45-degree adapter and extender are supplied so the electronic oil pressure sensor can be positioned to clear the intake or distributor. It’s important not to use any thread sealing tape or compound as the sensor gets its ground through the threads into the block. If possible, it’s best to mount the temperature sensor near the thermostat. Just like the oil sensor, it is recommended not to use a thread sealer. If you insist, Classic recommends a conductive sealer to aid in a quality ground path. The signal generator for the speedometer, called an SN16, simply screws in place of the bulky speedometer cable. A shielded harness is supplied to keep out any electronic interference and connects to the speedometer through three wires.
Updating the original gear indicator is an option to consider. Our ’56 uses a column shifter to pull its TH-350 into gear so we opted for the electronic selector that CI offers. The system features a small interface box that receives the gear position signal from a potentiometer that you mount on the trans. It takes a little extra work but is easily programmed for the number of gears and each gear position, but it’s a nice feature to have working again.
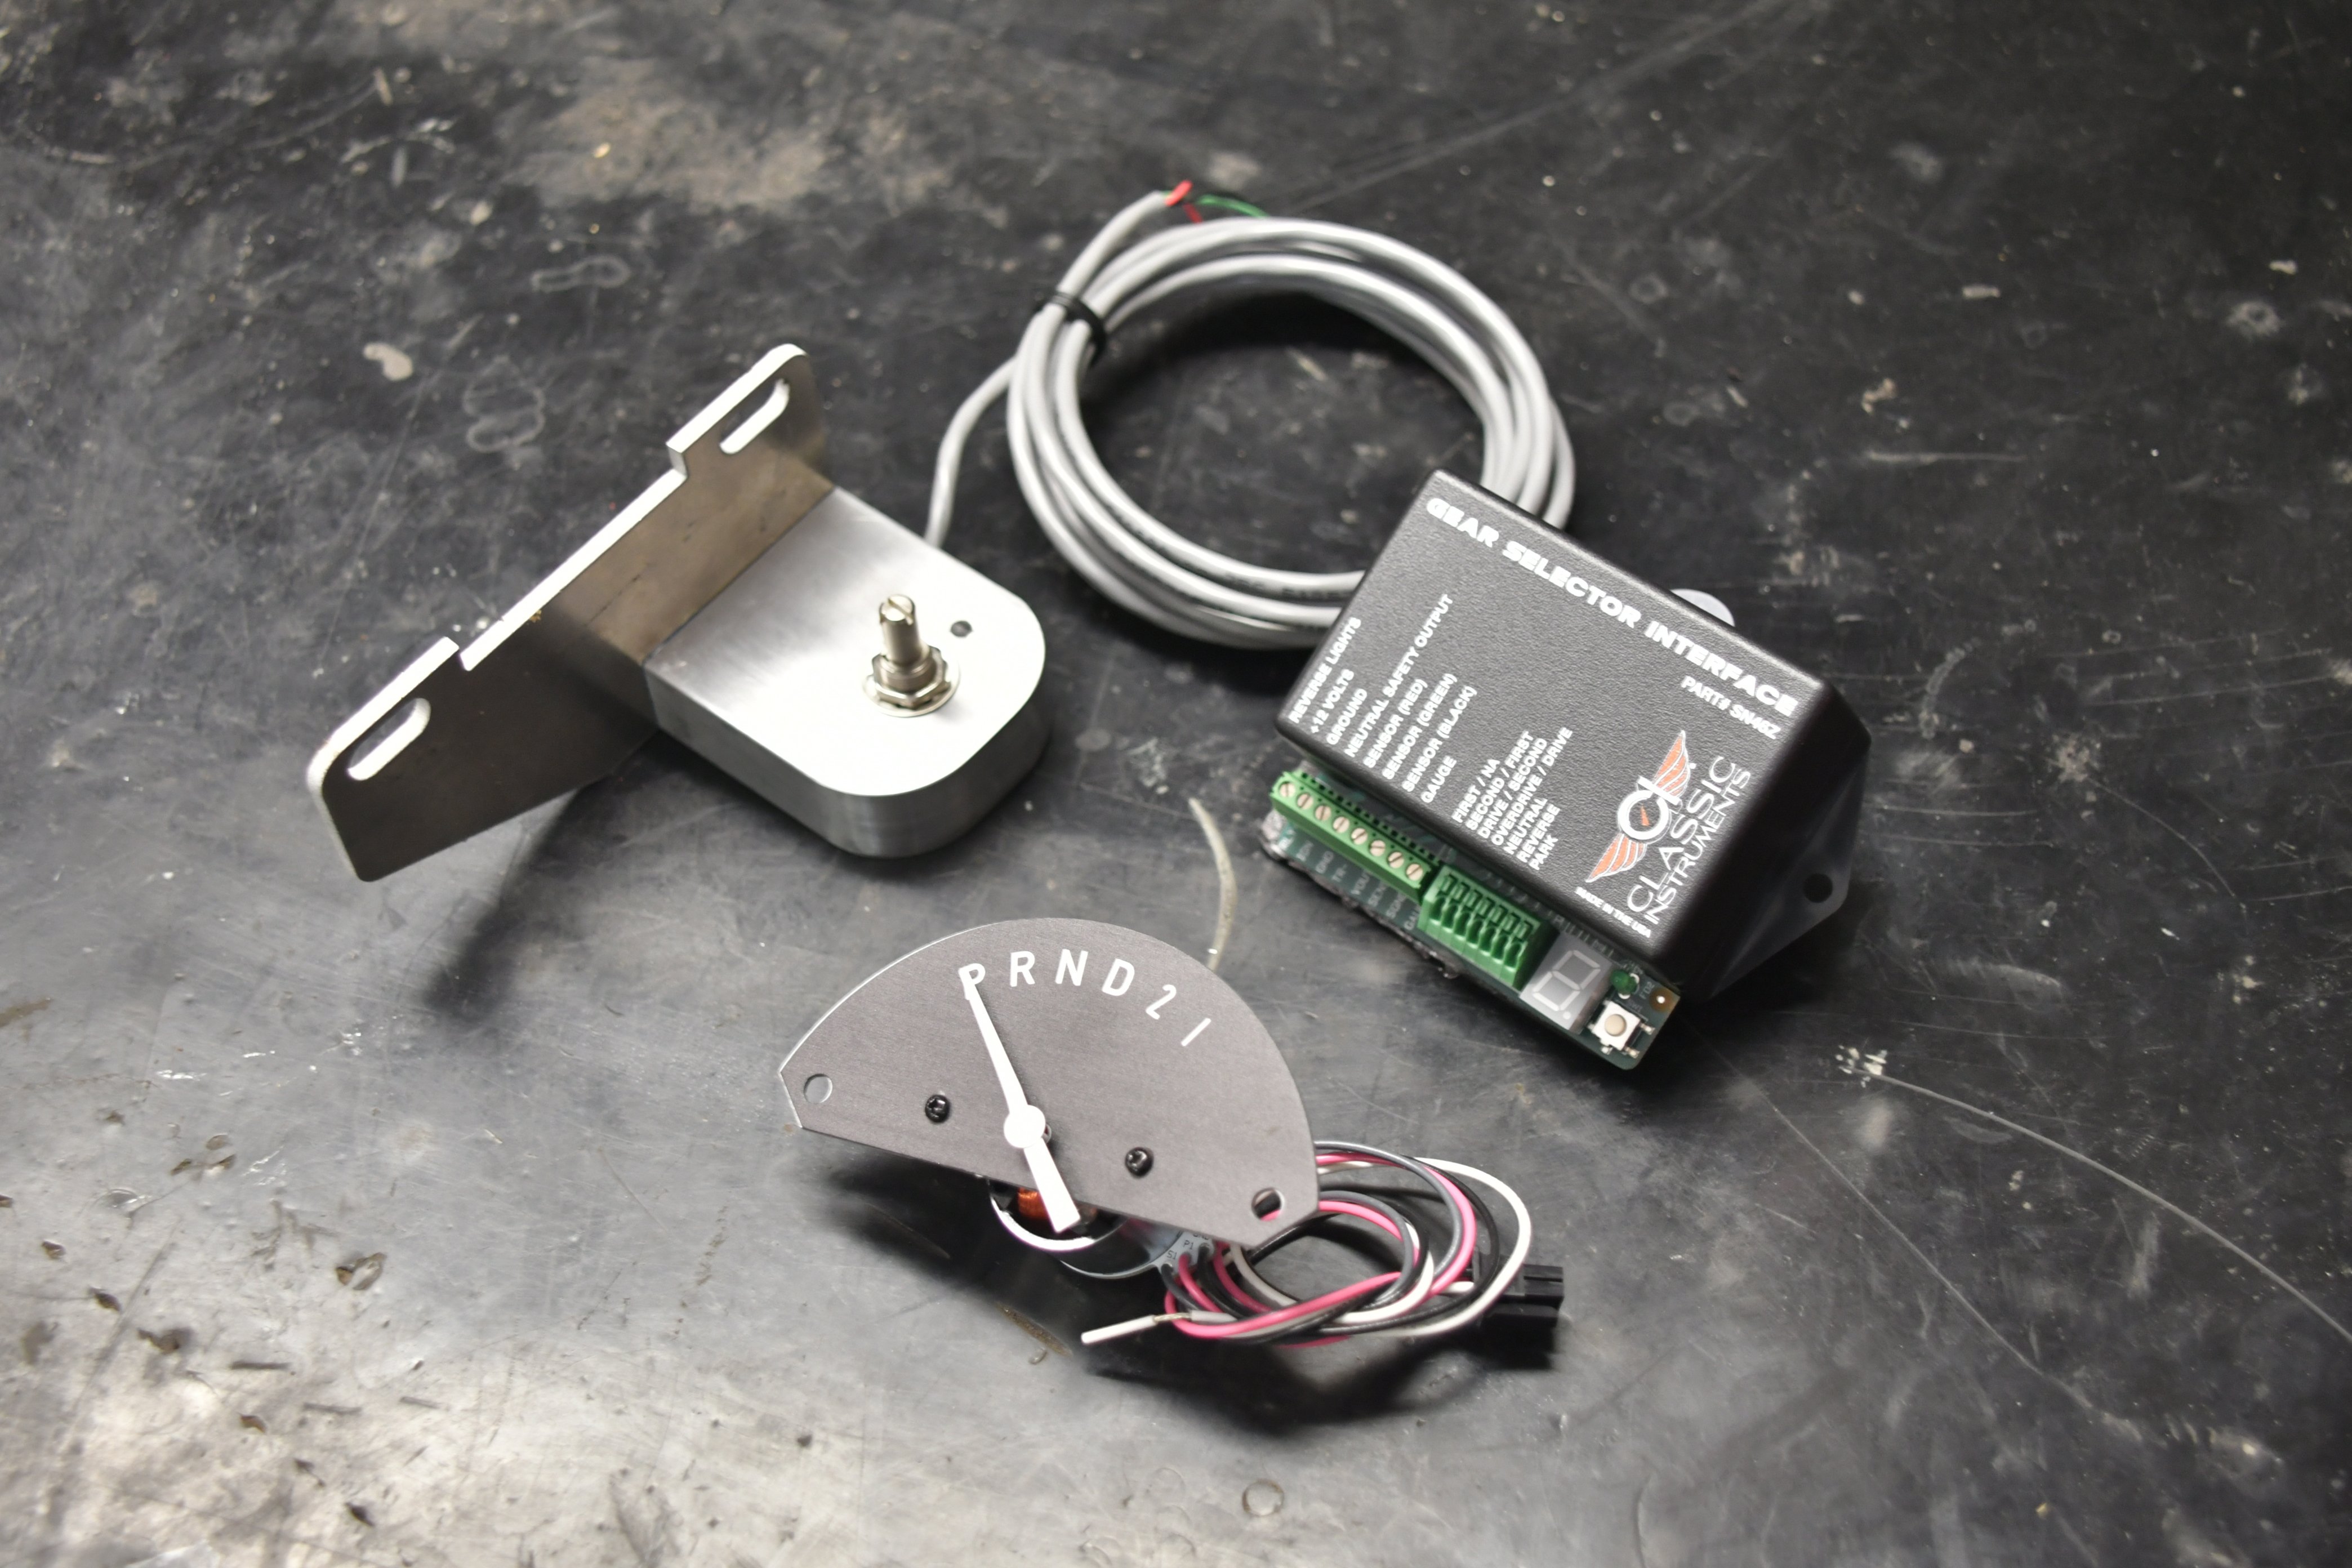
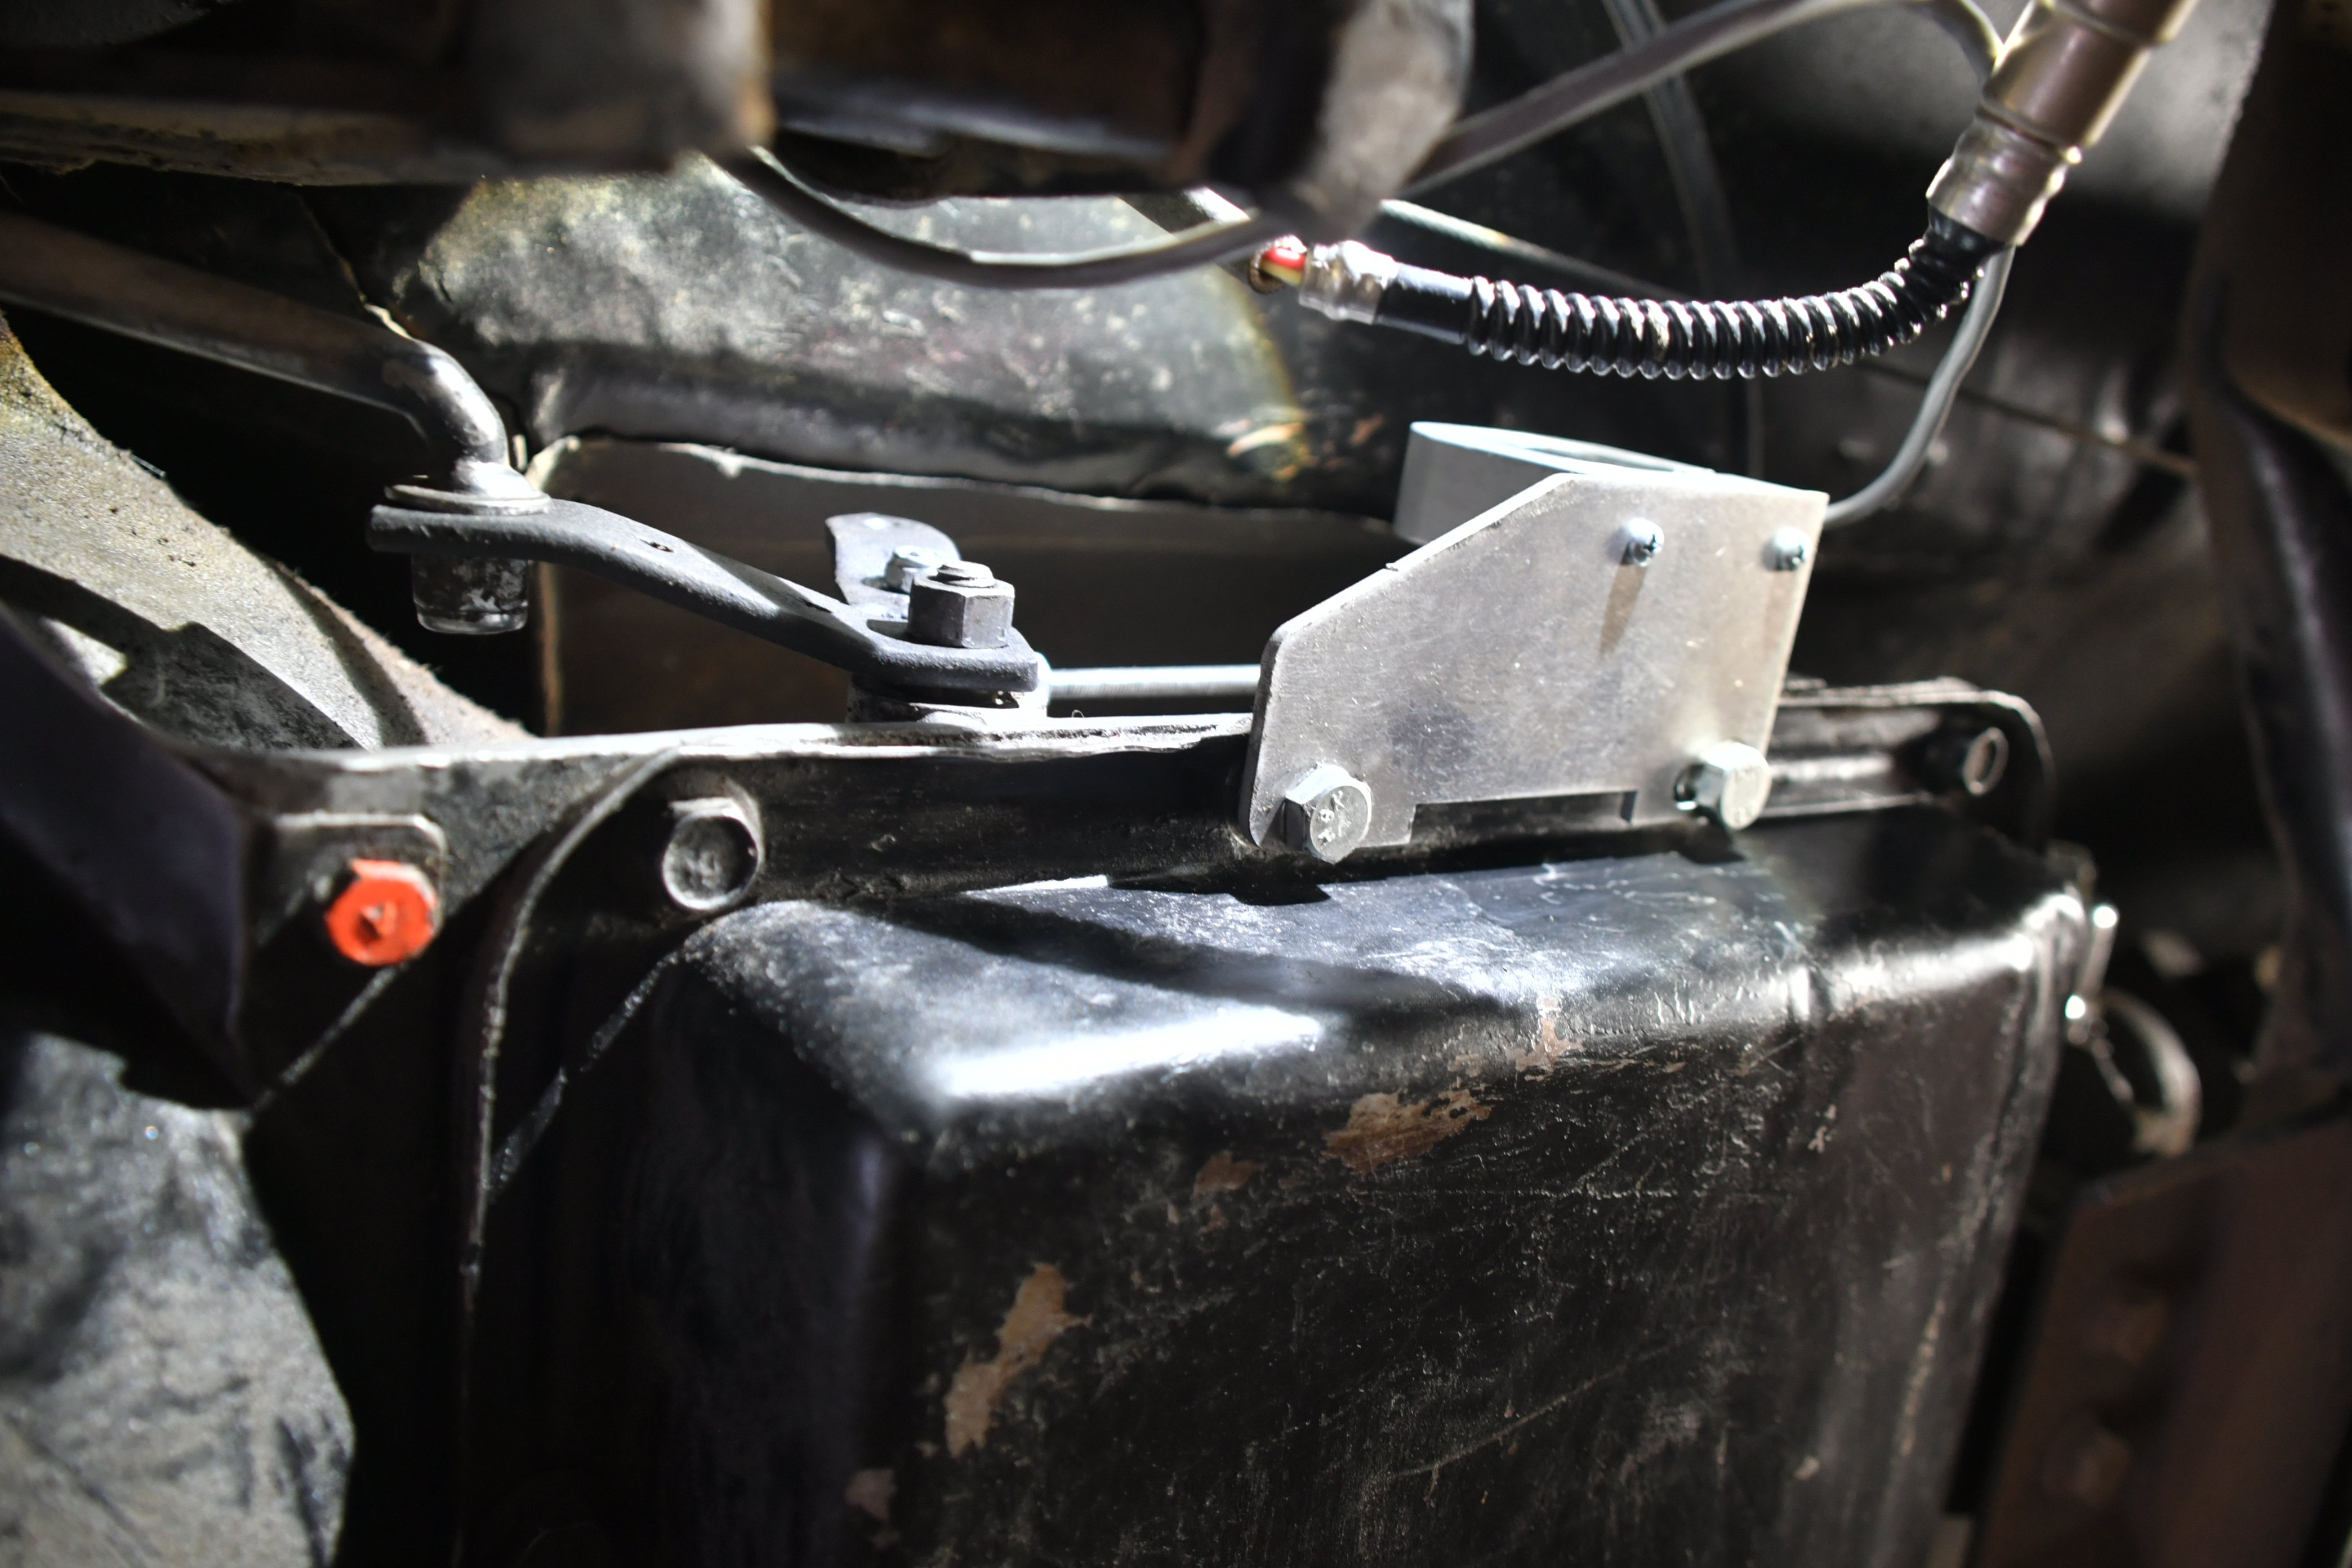
If a column shifter is still used, or if you want to have a gear indicator for your floor shifter, Classic offers an electronic version. The system includes a small potentiometer that connects to the shift linkage which sends a signal to a small gear selector interface. This device allows you to program the number of gears and set each position for the electronic indicator mounted in the dash. The potentiometer mounts to the side of the trans with two of the pan bolts. A hole needs to be drilled into the shift arm on the trans to connect a linkage between the arm and potentiometer.
Installation of the Bel-Era III dash was as straightforward as it gets. You’ll need to be ready for wiring as you’ll be connecting the new dash wires to the existing turn signals, high beam indicator, lights, temperature, and fuel. Plus, there will be new wires for the speed (three in the case of the signal generator), power, ground, oil pressure, and a programming wire to ground. All of your work will be rewarded as soon as you turn on the lights for the first time and see that new dash comes to life!
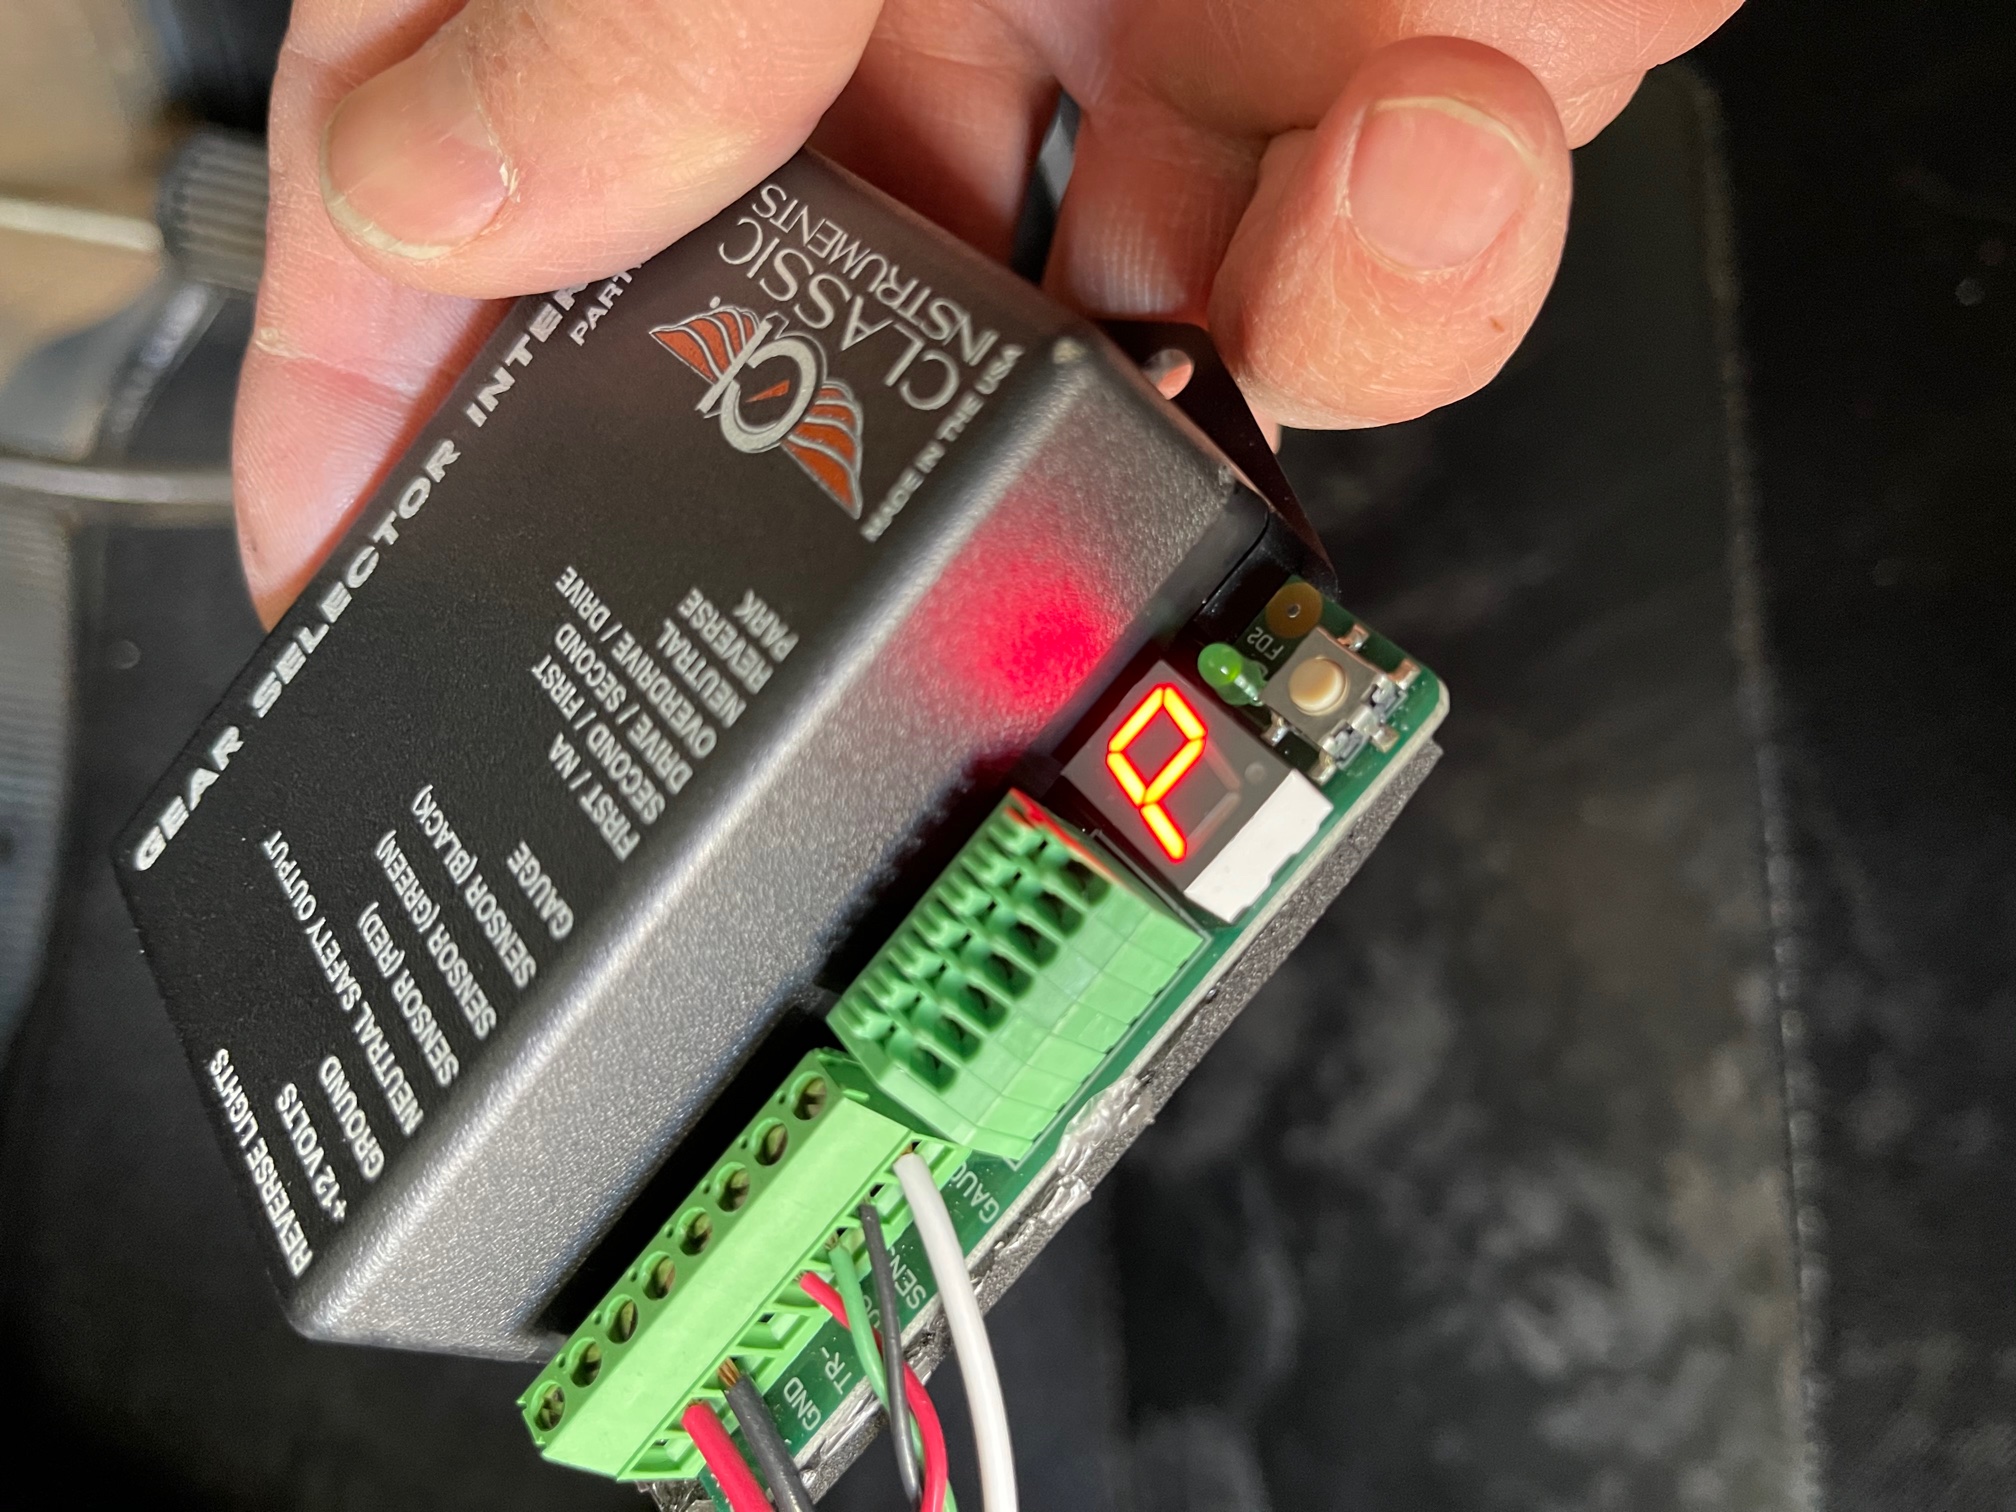
The wires from the potentiometer connect to the interface with three wires going up to the dash. Note the P on the small LED indicating park. The small button on the right gets the controller into calibration mode to set the number of gears, then you move the shifter through each gear to program the movement of the gear indicator in the dash.
The nice even lighting of the dash is a joy to see after years of looking over a half-lit dash and having a full set of gauges built into a stock-styled housing is really icing on the cake. It was a pleasant surprise to see how easy it was to program the speedometer with Classic’s advanced ZST technology, which we outline in more detail below.
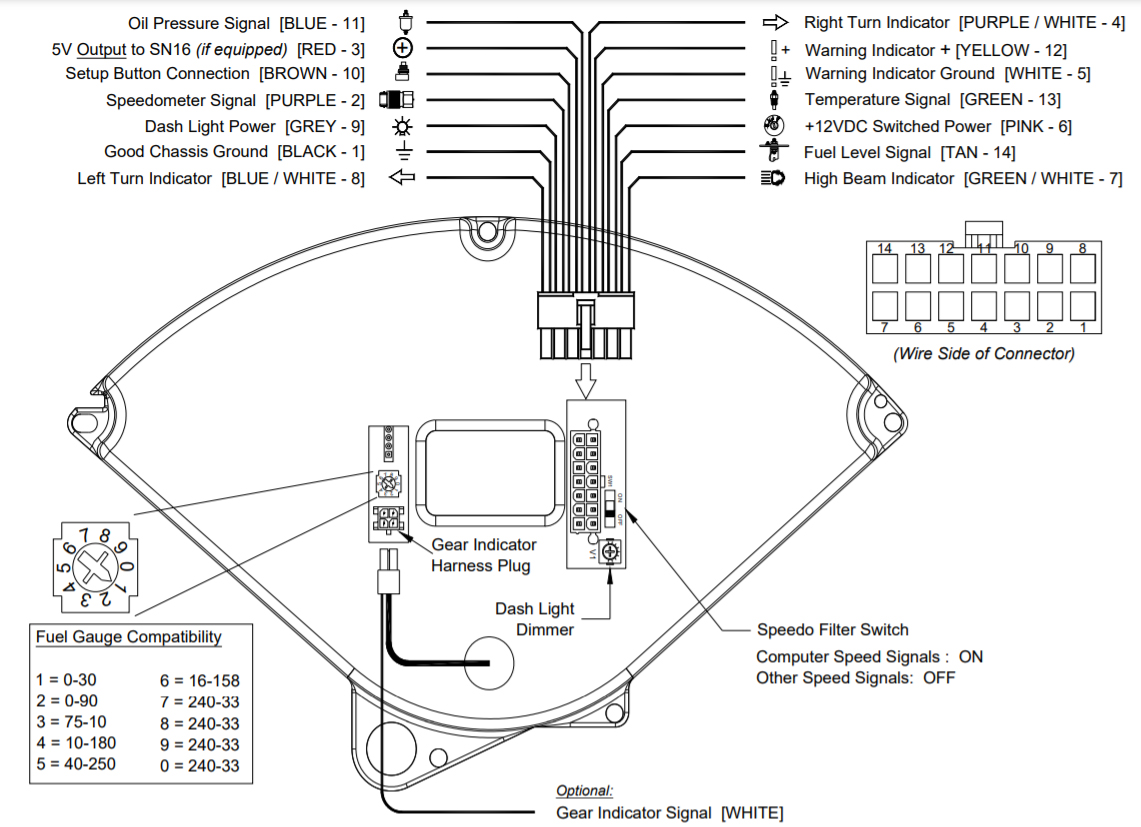
The overall wiring of the dash is straightforward and you’ll be using the existing wiring for the turn signals, high beam indicator, dash lights, coolant temp and fuel gauge. Speaking of which, the fuel gauge is adjustable for different sending units.
We’re getting close! The dash easily slides right back in place though with no bulky bulbs to push in place or break.
We know a new set of gauges has nothing to do with the overall performance of a car, but looking over the Bel-Era III sure makes it seem like the old ’56 drives a little smoother.
Speedometer Calibration
Classic’s Zeus Speedometer Technology (ZST) is what makes their speedometers so versatile and easy to calibrate. This allows the speedometer to work with nearly any application without the need for any external boxes. It easily wires to a pulse signal generator (which we used on the TH-350 trans), a Vehicle Speed Sensor (VSS) from a modern electronic transmission or even the output from an electronic trans control or ECU.
With ZST, it’s also very easy to calibrate your new speedometer. Classic provides a momentary switch that is small enough to hide under the dash, or even just removes after the speedo reads correctly. The switch simply connects to the Brown wire of the gauges and to the ground. By following a specific procedure with the switch, the speedometer will be put into calibration mode and allow you to accurately set your speed.
This little momentary switch is used to calibrate the speedometer. It simply connects between the ground and the brown wire of the new dash assembly.
There are three ways to calibrate the speedometer: Instant, Real-Time, and the Measured Mile. The first step in the procedure is to put the speedometer into calibration mode. This is done by holding down the button of the switch then starting the engine. Once started, release the button and the speedometer pointer will swing up to indicate 50 mph and the high beam indicator will be lit to verify its calibration mode.
We chose to use the Instant calibration mode which requires a GPS signal and our passenger had one on their phone. We put the speedo into Instant mode by pressing the programming button again, then drove the car at 30 mph as indicated by the GPS. Once we were at a steady 30 mph we pressed and held the button for about four seconds to set the speed.
At this point, the needle swept up to 30 mph and we were spot on with the GPS. At this time, both turn signal indicators light up to verify that the speed has been set. To exit calibration mode, we tapped the button until the needle pointed to 90 and held it for six seconds. The needle swung back to 30 and was now showing our real-time speed. Speedometer calibration was just that easy!
When in calibration mode, the high beam indicator glows and once everything is set, the turn signals will also illuminate until the key is cycled off and on.
The other two calibration methods are just as easy. The Measured Mile is exactly what the name implies; you drive a mile (at any speed) by indicating when you start and when you finish the mile. From there, the ZST technology creates a speed value from that mile.
The Bel-Era was just the upgrade this ’56 needed with the important gauges built-in and an accurate speedometer.
The Real-Time calibration is handy if you missed your cal by a few miles an hour. In this mode, you can easily adjust the speed up or down in small increments to get it set just right. Remember, it is safest to have someone riding along with you to monitor the GPS or distance that you’re driving!